
Chocolate bark is one of those treats that feels fancy but takes almost no effort. With just melted chocolate and a handful of toppings, you can create a beautiful, gift-worthy dessert in under 30 minutes. It’s perfect for holidays, parties, or those moments when you want something sweet without turning on the mixer.
What makes chocolate bark so appealing is its flexibility. You don’t need special tools, advanced skills, or exact measurements. If you can melt chocolate and sprinkle toppings, you can make this. Let’s break it down step by step.
What You Need to Make Chocolate Bark
Before you start, gather a few basic ingredients. This recipe works with whatever you have on hand.
Chocolate options:
- Dark chocolate for a rich, bold flavor
- Milk chocolate for classic sweetness
- White chocolate for a creamy, decorative base
Simple topping ideas:
- Chopped nuts (almonds, pistachios, peanuts)
- Dried fruit (cranberries, cherries, raisins)
- Pretzels or crackers for crunch
- Coconut flakes
- Mini chocolate chips
- Sprinkles or crushed cookies
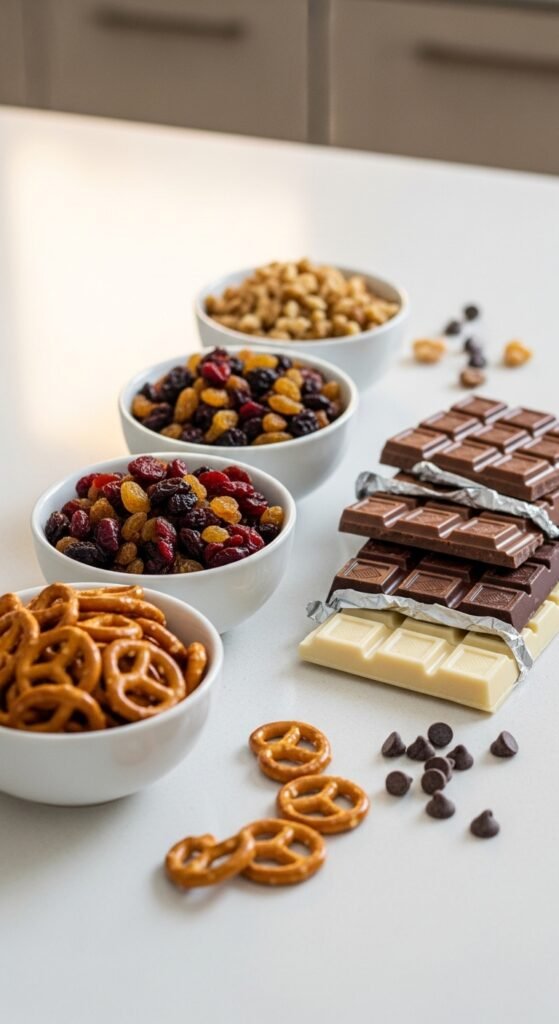
Tip: Choose toppings with different textures. A mix of crunchy and chewy makes every bite more interesting.
How to Melt Chocolate the Right Way
Melting chocolate properly is the key to smooth, glossy bark.
Microwave method (easy and quick):
- Chop chocolate into small, even pieces.
- Place in a microwave-safe bowl.
- Heat in 20–30 second intervals.
- Stir after each round until fully melted.
Double boiler method (more control):
- Place chocolate in a heat-safe bowl over gently simmering water.
- Stir constantly until smooth.
- Make sure no water touches the chocolate.
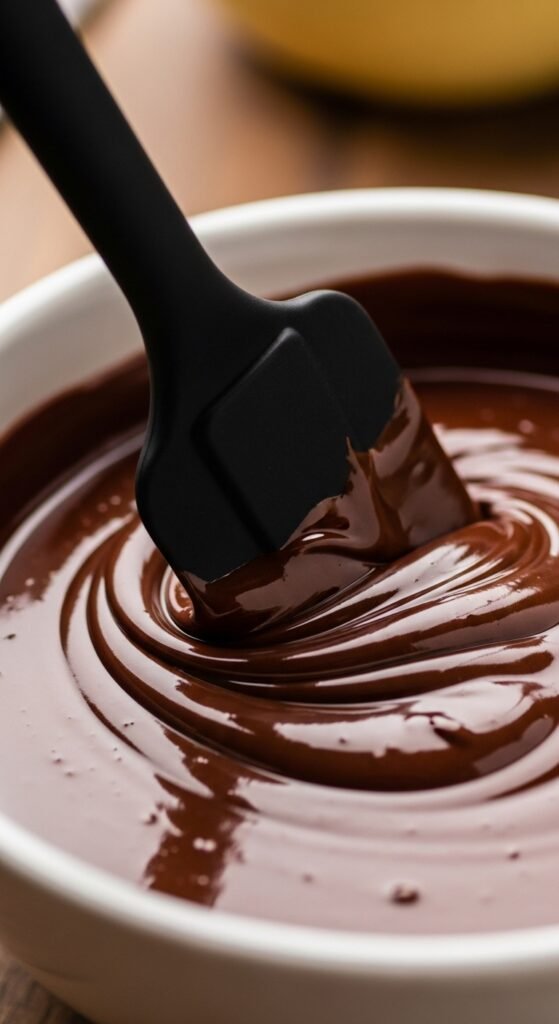
Helpful tip:
- If chocolate looks thick, add a small amount of neutral oil to loosen it.
Spreading and Topping Your Chocolate Bark
Once the chocolate is melted, work fairly quickly.
- Line a baking sheet with parchment paper.
- Pour melted chocolate onto the paper.
- Use a spatula to spread it into an even layer.
- Sprinkle toppings evenly while the chocolate is still warm.
- Gently press toppings so they stick.
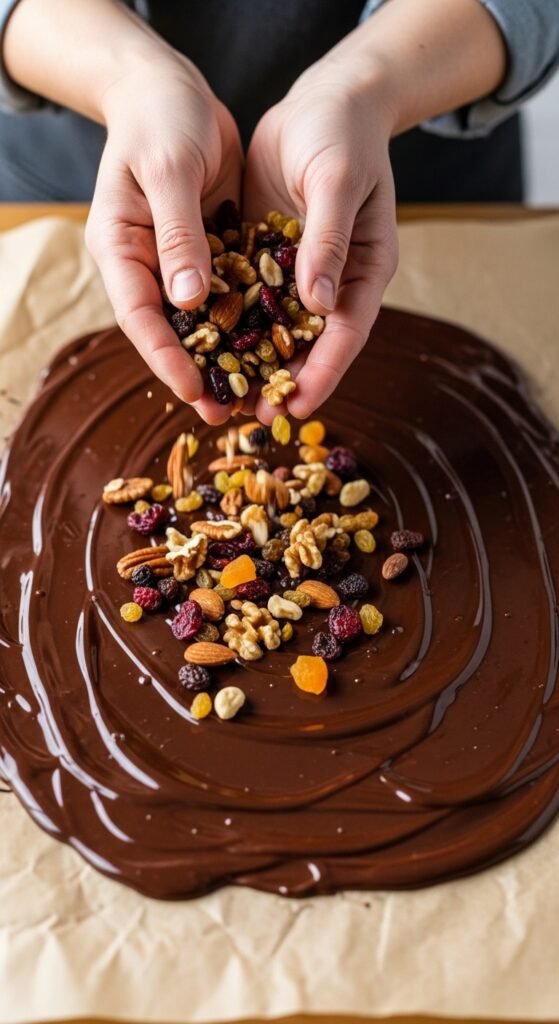
Design tip:
- Leave some chocolate visible between toppings so the bark doesn’t feel overcrowded.
- Add toppings in clusters for a more natural, handmade look.
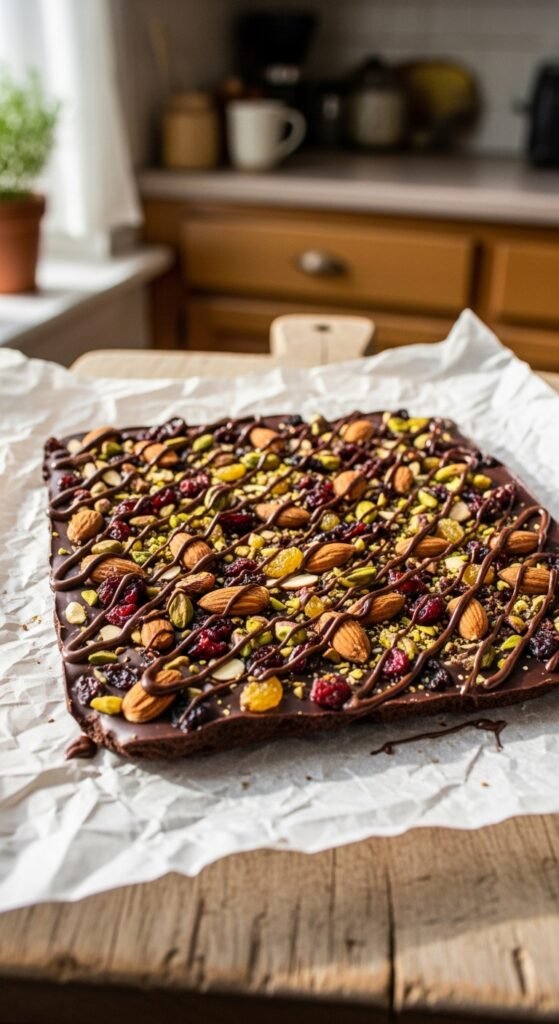
Setting and Breaking the Bark
Let the chocolate set until completely firm.
You can:
- Leave it at room temperature for about 1 hour
- Refrigerate for 15–20 minutes if you’re short on time
Once set:
- Lift the bark using the parchment paper.
- Break into irregular pieces by hand or with a knife.
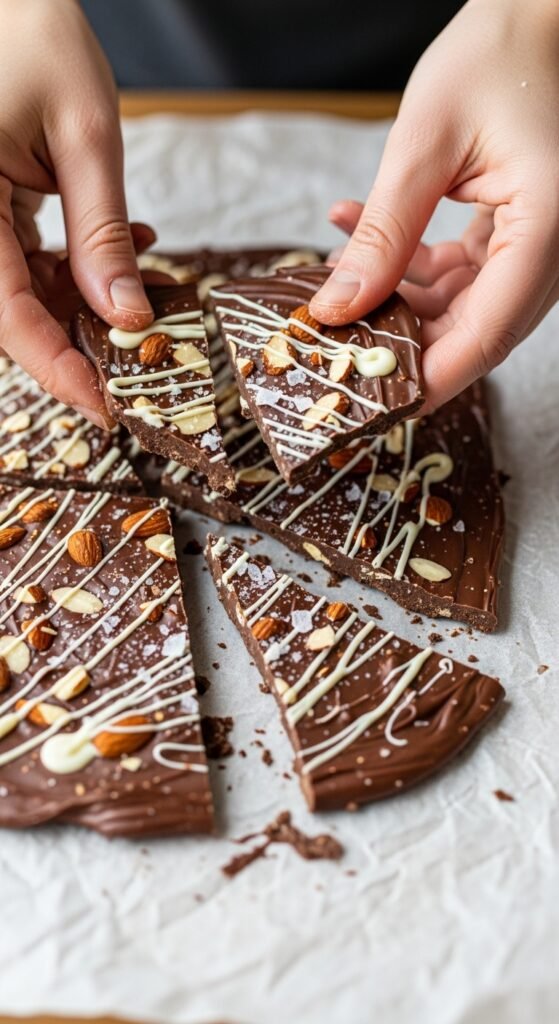
Irregular pieces make bark feel rustic and inviting, which is part of its charm.
Flavor Combinations That Always Work
If you’re not sure where to start, try these easy combinations:
- Dark chocolate + almonds + dried cranberries
- Milk chocolate + pretzels + chocolate chips
- White chocolate + crushed cookies + sprinkles
- Mixed chocolate swirls + coconut flakes + nuts
Mixing chocolates is especially fun. Melt two types separately, spread one, drizzle the other on top, and swirl gently with a toothpick.
Storage and Gifting Tips
Chocolate bark stores well and makes an excellent homemade gift.
To store:
- Keep in an airtight container
- Store at room temperature in a cool, dry place
- Separate layers with parchment paper
For gifting:
- Place pieces in clear treat bags
- Tie with ribbon or twine
- Add a handwritten label for a personal touch
Chocolate bark stays fresh for up to two weeks when stored properly.
Common Mistakes to Avoid
- Overheating chocolate, which makes it grainy
- Adding toppings after the chocolate starts to set
- Using wet toppings that can cause streaking
- Spreading the chocolate too thin
Keep it simple, and you’ll get great results every time.
Final Thoughts
Chocolate bark is proof that simple ingredients can create something truly special. It’s quick, customizable, and always impressive, whether you’re making it for yourself or sharing it with others.
Save this recipe for later, experiment with your favorite toppings, and enjoy creating your own signature chocolate bark.

Leave a Reply