
There’s nothing more disappointing than slicing into a beautiful pie… only to find a damp, limp bottom crust. The good news? A soggy pie crust is totally preventable with a few smart techniques and simple tweaks. Once you know what causes sogginess—and how to stop it—you’ll get crisp, flaky results every single time.
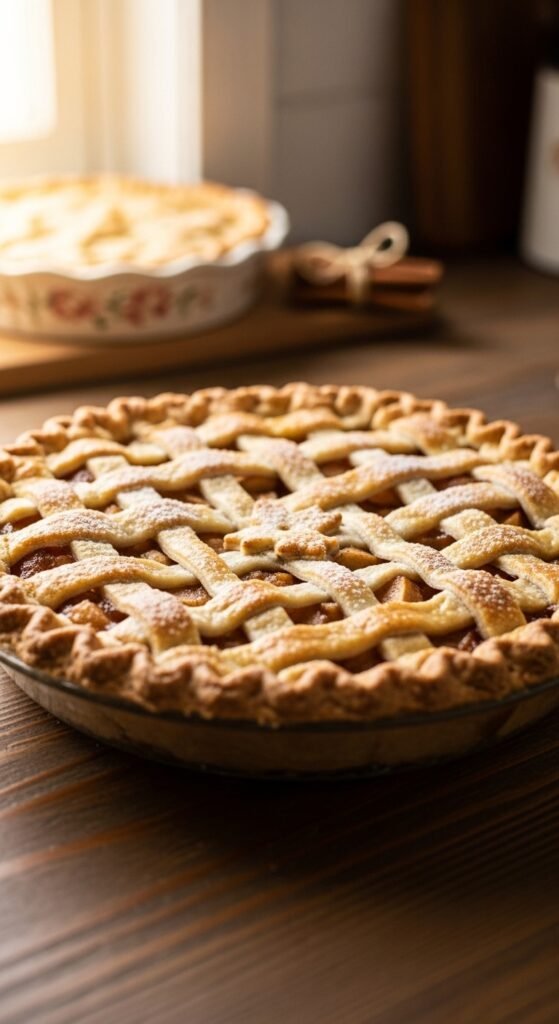
Whether you’re baking fruit pies, custard pies, or savory bakes, this guide walks you through everything step by step—no complicated tools, no stress, just reliable, bakery-style results.
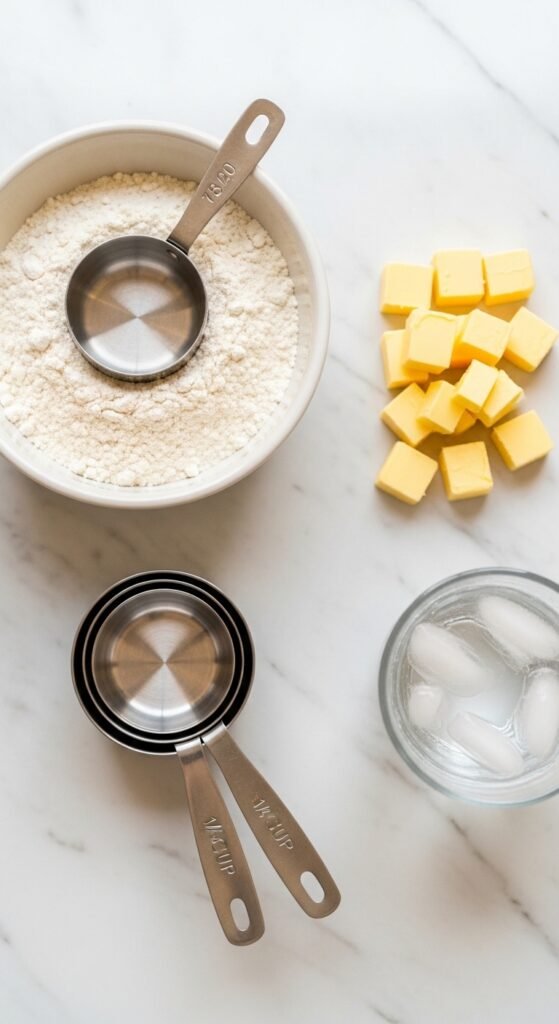
Start With the Right Ingredients
A sturdy, flaky crust begins before you even touch the oven. The ingredient choices you make set the foundation for success.
Key basics to focus on:
- Cold fat (straight from the fridge)
- All-purpose flour for structure
- Ice-cold water to control gluten development
- A pinch of salt for flavor balance
Cold fat creates steam pockets as it melts, which helps the crust puff slightly instead of absorbing moisture from the filling.
Quick tip: If your kitchen is warm, chill your mixing bowl for a few minutes before starting.
Blind Baking Is Non-Negotiable
If you want a crisp bottom crust, blind baking is the single most important step—especially for pies with juicy or creamy fillings.
Blind baking means partially or fully baking the crust before adding the filling.
How to do it right:
- Roll out the dough and fit it into the pan.
- Chill the crust for at least 30 minutes.
- Line with parchment paper.
- Fill with pie weights, dry beans, or rice.
- Bake until the edges look set and lightly golden.
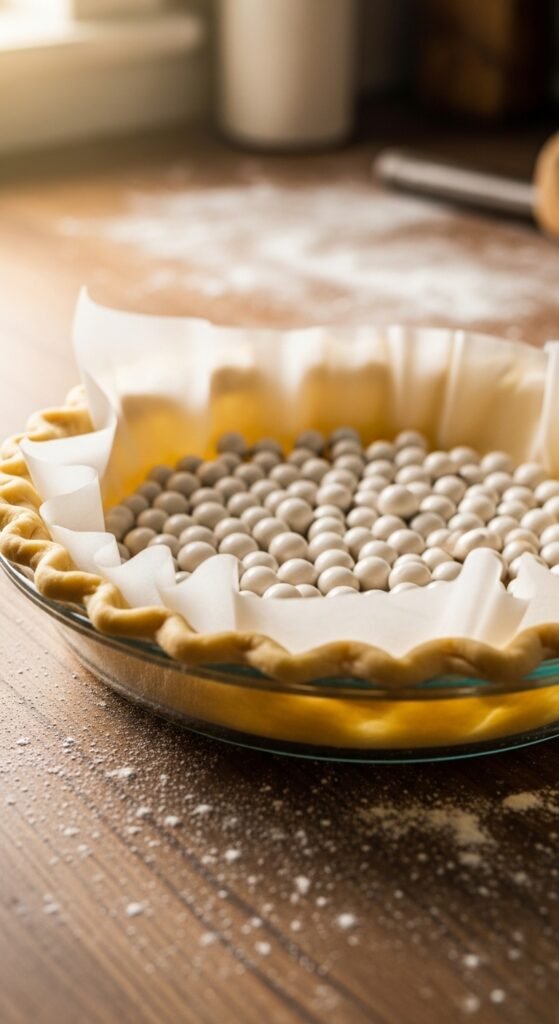
Chilling the crust before baking helps prevent shrinkage and keeps the fat cold until it hits the heat.
Seal the Crust to Block Moisture
Think of sealing as adding a protective barrier between the crust and the filling.
Easy sealing options:
- Brush the bottom with egg white and bake for 2–3 more minutes.
- Sprinkle a thin layer of breadcrumbs, ground nuts, or crushed crackers over the crust.
- Use a light dusting of flour mixed with sugar for fruit pies.
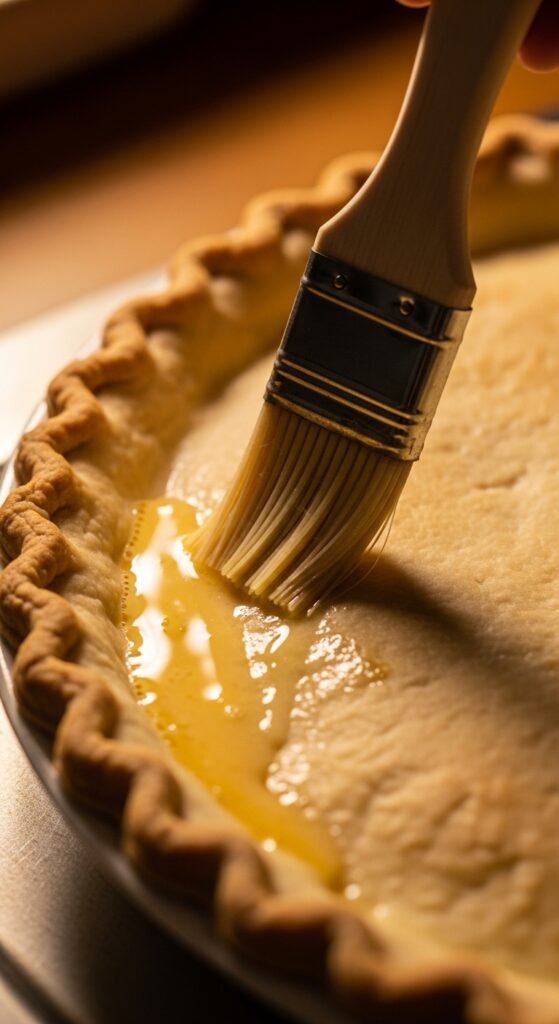
These layers absorb excess liquid before it reaches the crust, keeping it crisp even after slicing.
Adjust Juicy Fillings the Smart Way
Many soggy crust problems come from overly wet fillings, especially fruit-based ones.
Ways to manage excess moisture:
- Toss fruit with thickener before baking.
- Let cooked fillings cool slightly before adding them to the crust.
- Avoid overfilling the pie shell.
Common thickening options include:
- Cornstarch
- Tapioca starch
- Flour (use sparingly)

Letting fruit sit for a few minutes before baking helps you see how much liquid it releases—giving you better control.
Choose the Right Pan and Oven Temperature
Your baking equipment matters more than most people realize.
Best pan choices:
- Glass: heats evenly and helps brown the bottom.
- Metal: conducts heat quickly for crisp results.
- Avoid thick ceramic if sogginess is a recurring issue.
Oven tips:
- Always preheat fully.
- Start baking at a higher temperature (around 425°F / 220°C) for the first 15 minutes.
- Lower the temperature to finish baking evenly.
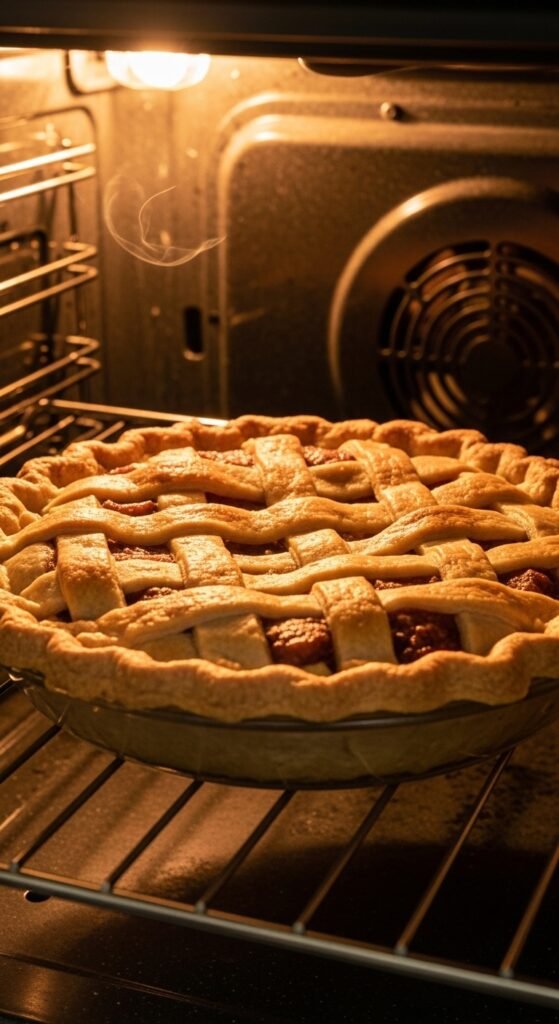
Placing the pie on the lower oven rack helps direct heat to the bottom crust first.
Let the Pie Cool Before Cutting
It’s tempting to slice right away—but patience pays off.
Cooling allows:
- Fillings to set properly
- Steam to escape instead of soaking downward
- The crust to firm up and stay flaky
For best results, let the pie cool at least 2–3 hours at room temperature.
Final Takeaway
A soggy pie crust isn’t bad luck—it’s usually just one skipped step. With blind baking, proper sealing, controlled fillings, and the right oven setup, you can confidently bake pies that stay crisp from the first slice to the last.
Save this guide for later, pin it to your baking board, and enjoy pie crust that finally lives up to the filling inside

Leave a Reply