
Coating desserts in chocolate might seem like a simple task, but doing it neatly and beautifully can be a challenge. Whether you’re dipping strawberries, covering truffles, or coating cake pops, there’s a perfect technique to achieve that smooth, glossy finish. With a few simple tricks and some practice, you can make your chocolate-coated treats look as good as they taste.
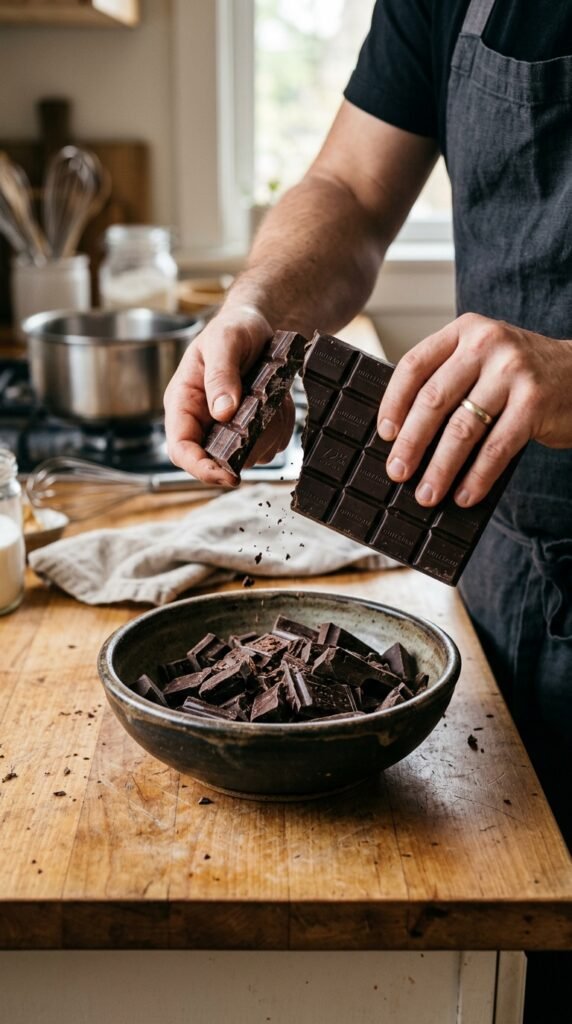
Step 1: Choose the Right Chocolate
Before you dive into the coating process, selecting the right chocolate is crucial. You can use dark, milk, or white chocolate, depending on your preference or the flavor of the dessert. However, for the best finish, always opt for high-quality chocolate.
Tips for Choosing Chocolate:
- Chocolates with higher cocoa content (70% and above) tend to melt smoother and coat better.
- Tempered chocolate is ideal for a glossy finish. If you don’t temper your chocolate, it might have a dull appearance once cooled.
- Chocolate chips can be convenient, but they might not melt as evenly as a block of chocolate.
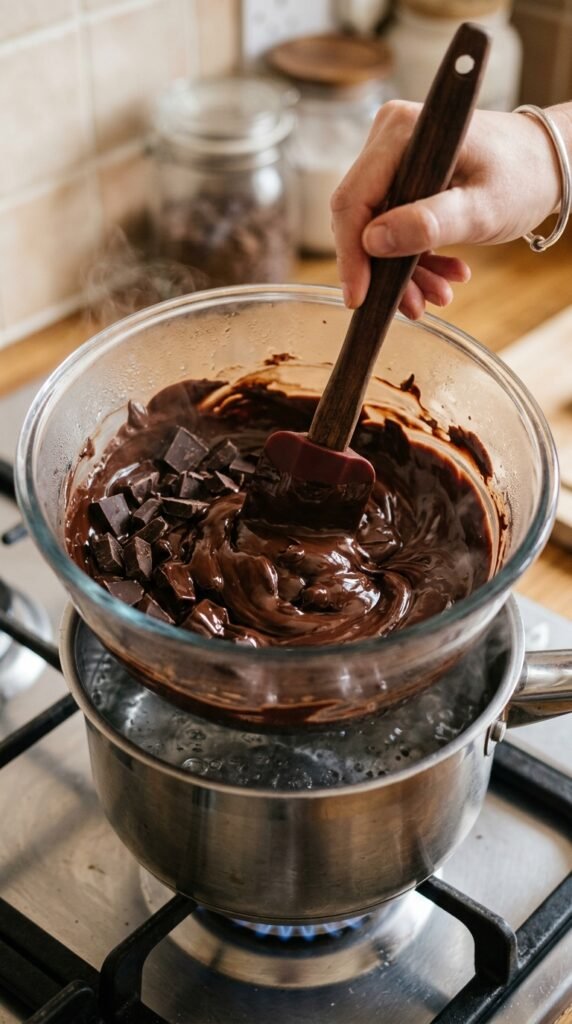
Step 2: Melt the Chocolate
Once you’ve chosen your chocolate, it’s time to melt it. Melting the chocolate properly is key to a smooth, even coating.
How to Melt Chocolate:
- Double boiler method: Fill a pot with a few inches of water and place a heatproof bowl on top. Add your chopped chocolate to the bowl, ensuring it doesn’t touch the water. Stir occasionally until melted.
- Microwave method: Place your chopped chocolate in a microwave-safe bowl. Heat on 50% power for 30-second intervals, stirring between each, until fully melted.
Pro Tip:
If your chocolate seems too thick after melting, add a small amount of vegetable oil or cocoa butter to thin it out. This will make it easier to dip your desserts evenly.
Step 3: Prepare Your Desserts for Dipping
Before you start dipping, make sure your desserts are prepped and ready. If you’re coating something like strawberries, cake pops, or truffles, ensure they’re cool and dry. Any moisture will cause the chocolate to seize up and ruin the smoothness.
Tips for Preparation:
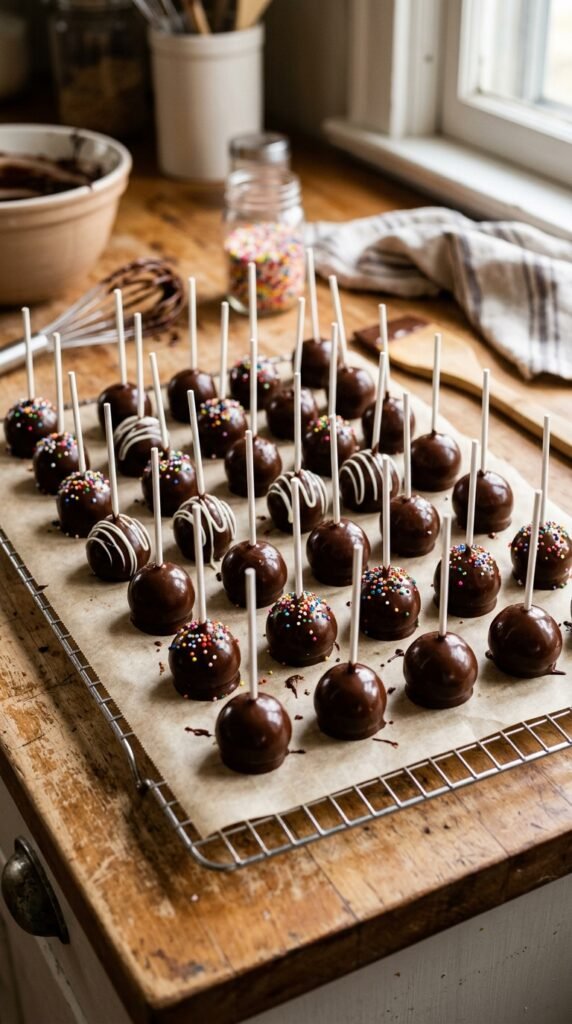
- Truffles or cake pops: Stick them on a skewer or a lollipop stick for easy dipping.
- Fruits like strawberries: Gently pat them dry with a paper towel before dipping.
- Chilled items: Refrigerate your desserts for 15-30 minutes before dipping to help the chocolate set faster.
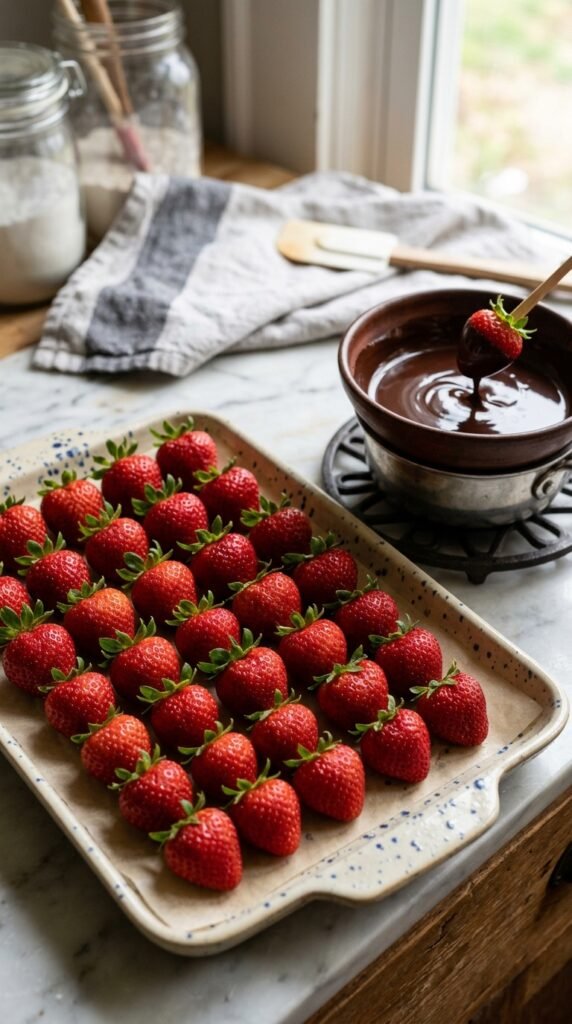
Step 4: Dip the Dessert
Now comes the fun part! Carefully dip your dessert into the melted chocolate, ensuring it’s fully coated.
How to Dip:
- Dip and swirl: Gently lower your dessert into the chocolate and swirl it around to ensure it’s coated evenly.
- Avoid over-dipping: Don’t leave your dessert in the chocolate for too long, as it might cause it to become too thick.
- Use a fork or skewer: For precision and to avoid messy fingers, use a fork or skewer to dip your treats. Gently tap off any excess chocolate before setting the coated dessert down.
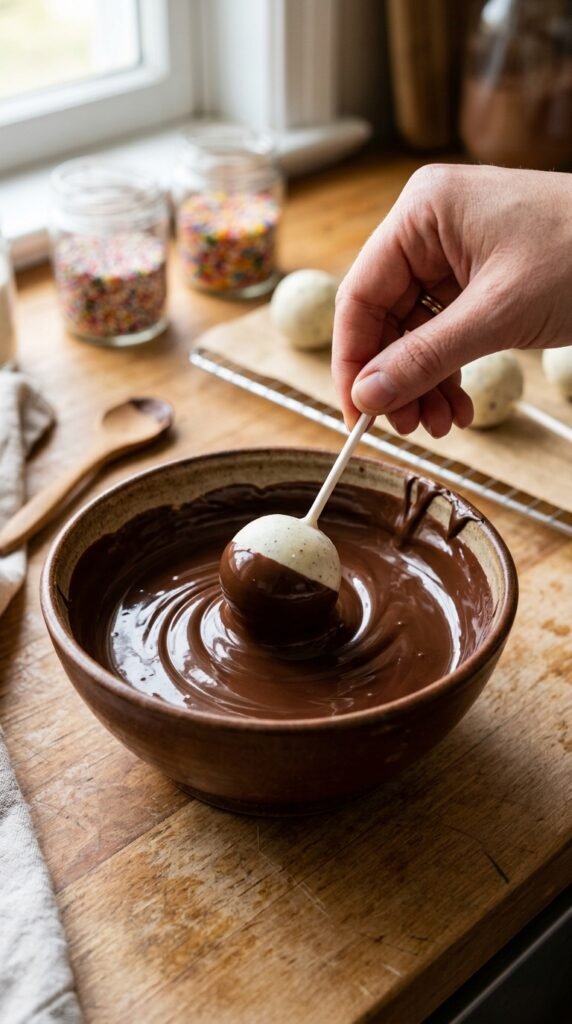
Step 5: Set the Chocolate Coating
After dipping, it’s important to set the chocolate so it hardens into a perfect finish. The best way to do this is to let your desserts cool at room temperature, or for quicker results, you can refrigerate them.
Setting Tips:
- Room temperature setting: Place your dipped desserts on parchment paper or a silicone baking mat to prevent them from sticking. Let them cool for about 30 minutes.
- Refrigeration: If you want the chocolate to set faster, pop your desserts in the fridge for 10-15 minutes. Just be careful not to leave them too long, as the cold can cause the chocolate to become dull.
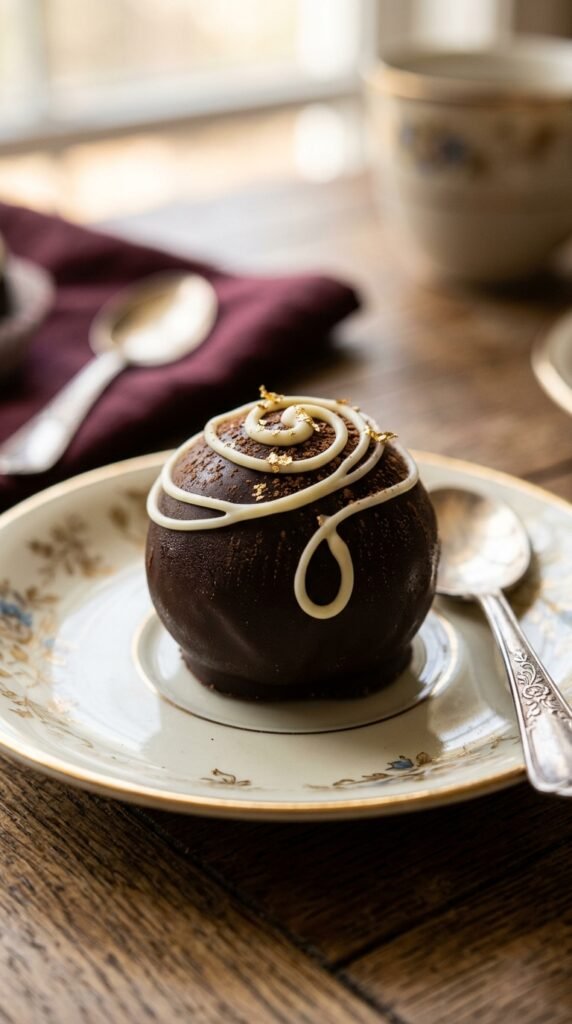
Step 6: Add Decorative Touches
For an extra touch of elegance, consider decorating your chocolate-coated desserts. You can add sprinkles, crushed nuts, or a drizzle of contrasting chocolate for a professional finish.
Decoration Ideas:
- Drizzle contrasting chocolate: Drizzle white chocolate over dark chocolate for a beautiful contrast.
- Sprinkles: Add festive sprinkles, edible glitter, or crushed candy for extra flair.
- Nuts and fruits: Roll the coated dessert in crushed nuts or dried fruits before the chocolate sets.
Step 7: Serve and Enjoy
Your chocolate-coated desserts are now ready to enjoy! Whether you’re serving them at a party, as a gift, or as a special treat for yourself, they’ll be sure to impress.
Final Tips:
- Be patient: Allow the chocolate to fully harden before serving, as this ensures it has the perfect finish.
- Store properly: Keep your chocolate-covered desserts in an airtight container at room temperature for up to a week.

Conclusion
Coating desserts in chocolate neatly requires the right technique and a bit of patience, but the result is always worth it. Whether you’re making cake pops, strawberries, or truffles, following these steps will help you create beautiful, delicious chocolate-coated treats. Save this guide for your next dessert-making adventure, and impress your guests with your chocolate-coating skills!

Leave a Reply