
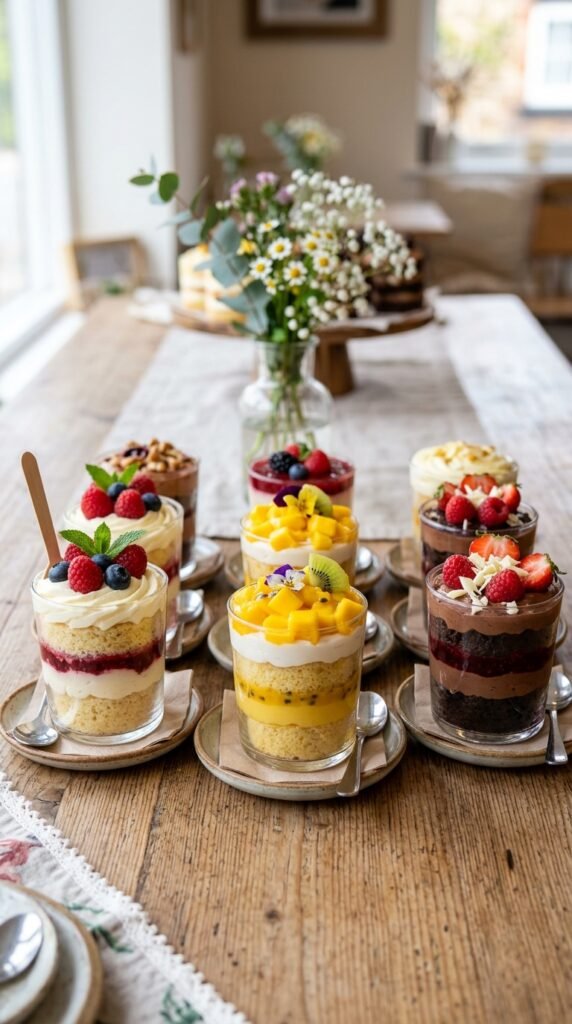
If you’re craving something sweet, visually stunning, and incredibly easy to make, cake dessert cups with layers are your go-to treat! Whether you’re hosting a party, celebrating a special occasion, or just want to indulge in a little dessert heaven, these layered cake cups are the perfect choice.
Imagine rich, moist cake sitting perfectly between layers of smooth frosting, topped with fresh fruit or sprinkles—sounds irresistible, right? These little cups of joy can be customized with endless flavors and decorations, making them a fun treat for all ages.
Ingredients for Cake Dessert Cups
Before we get started, let’s gather everything we’ll need for these delightful dessert cups:
- Cake Base: You can use any cake recipe you love! A box mix works just fine, or you can go for a homemade version like vanilla, chocolate, or even red velvet.
- Frosting: Buttercream, cream cheese frosting, or whipped cream—pick your favorite! You can also get creative and use chocolate ganache or fruit-flavored frostings.
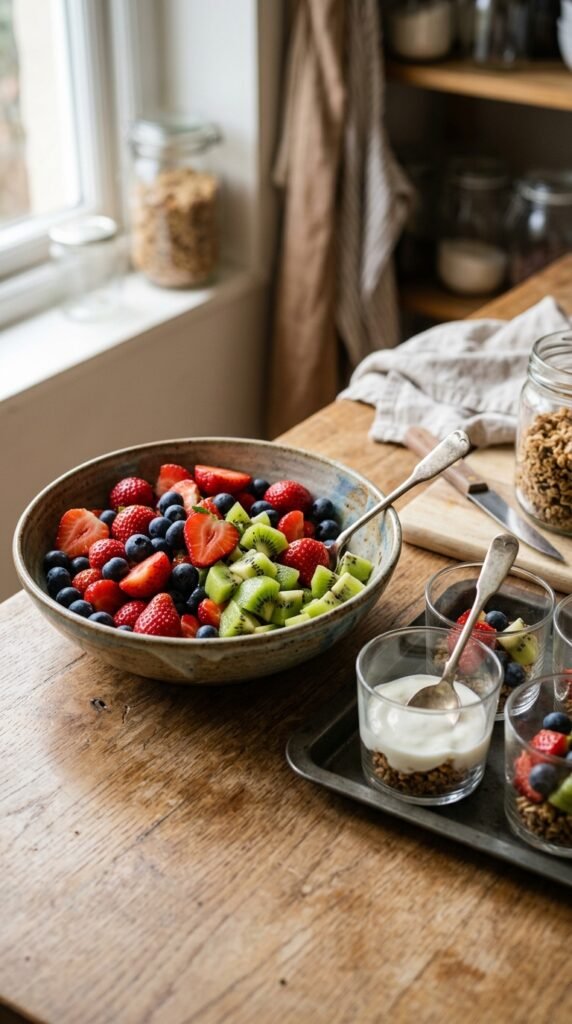
- Toppings: Fresh fruit (berries, kiwi, or mango), chocolate chips, sprinkles, or crushed cookies. The possibilities are endless!
- Cup/Glass: Small clear cups, mason jars, or even shot glasses work best to showcase the beautiful layers.
Step 1: Bake the Cake Base
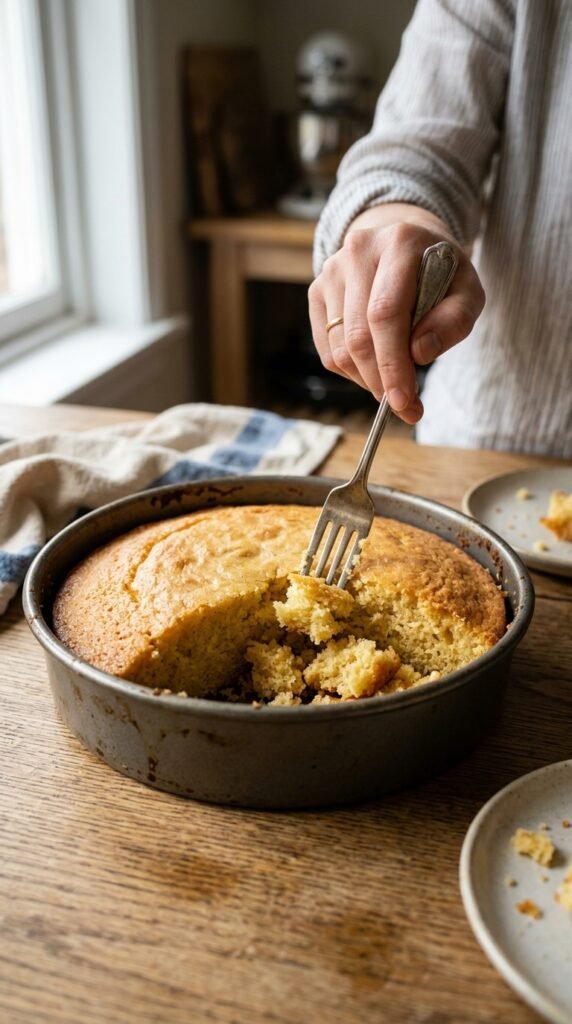
Start by baking your cake. If you’re using a box mix, follow the instructions on the box for a moist and fluffy result. For homemade cakes, make sure the batter is evenly mixed and baked until a toothpick comes out clean. Allow the cake to cool completely before starting the next step.
Once cooled, crumble the cake into small pieces. This can be done by hand or with a fork for a finer crumble. This is the perfect texture for layering in your dessert cups.
Step 2: Prepare the Frosting
While your cake is cooling, make the frosting of your choice. For a light and fluffy option, whip up some buttercream frosting by beating butter, powdered sugar, vanilla extract, and a splash of milk until smooth and creamy. If you prefer something tangy, try cream cheese frosting by mixing cream cheese with butter, powdered sugar, and vanilla. Keep the frosting fluffy but not too runny!
Pro Tip: For a more sophisticated twist, you can mix in some food coloring to make your frosting match the theme of your dessert.
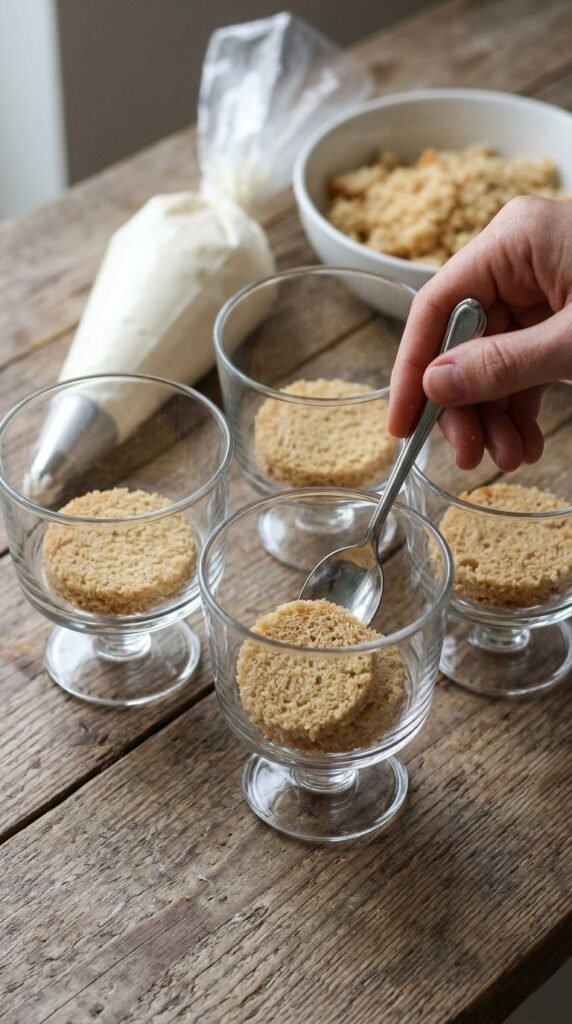
Step 3: Layer the Cake and Frosting
Now comes the fun part—layering! Take your prepared dessert cups and start by placing a layer of crumbled cake at the bottom. Gently press it down so it forms a solid base.
Next, add a layer of frosting over the cake, using a piping bag or spoon to evenly distribute it. You can swirl the frosting for a decorative look or simply smooth it flat. Repeat this process—cake, frosting, cake, frosting—until you reach the top of the cup. For a little extra flair, top with a final layer of frosting or whipped cream.
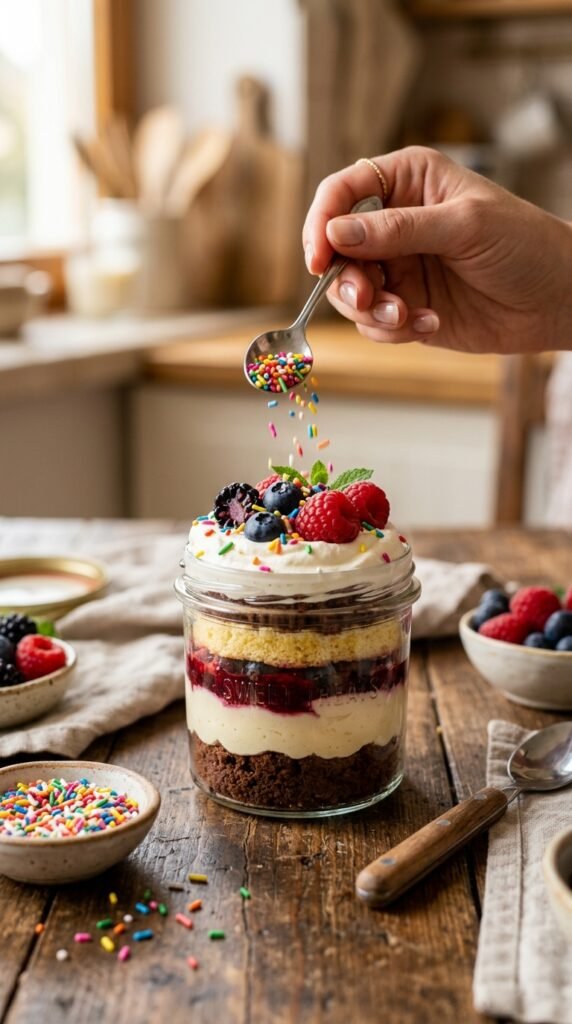
Step 4: Add Toppings and Decor
Toppings are where you can get creative! Choose your favorite fruits—strawberries, blueberries, raspberries, or even tropical fruits like mango and kiwi. For a more decadent touch, sprinkle chocolate chips, crushed cookies, or even candy pieces on top. A few fresh mint leaves can add a pop of color too!
You can also make your dessert cups festive by decorating them with themed sprinkles or edible glitter.
Step 5: Chill and Serve
Once your layers are complete, place the dessert cups in the refrigerator to chill for at least 30 minutes. This helps the layers set and allows the flavors to meld together. If you’re making these ahead of time, you can store them in the fridge overnight—just make sure to cover them tightly with plastic wrap or a lid.
When ready to serve, garnish the cups with any remaining toppings like extra fruit or a drizzle of chocolate sauce.
Tips for Perfect Layered Cake Dessert Cups
- Texture Balance: Keep your layers balanced. The cake should be moist and not too dry, while the frosting should be light and fluffy. Both layers should complement each other without overwhelming the other.
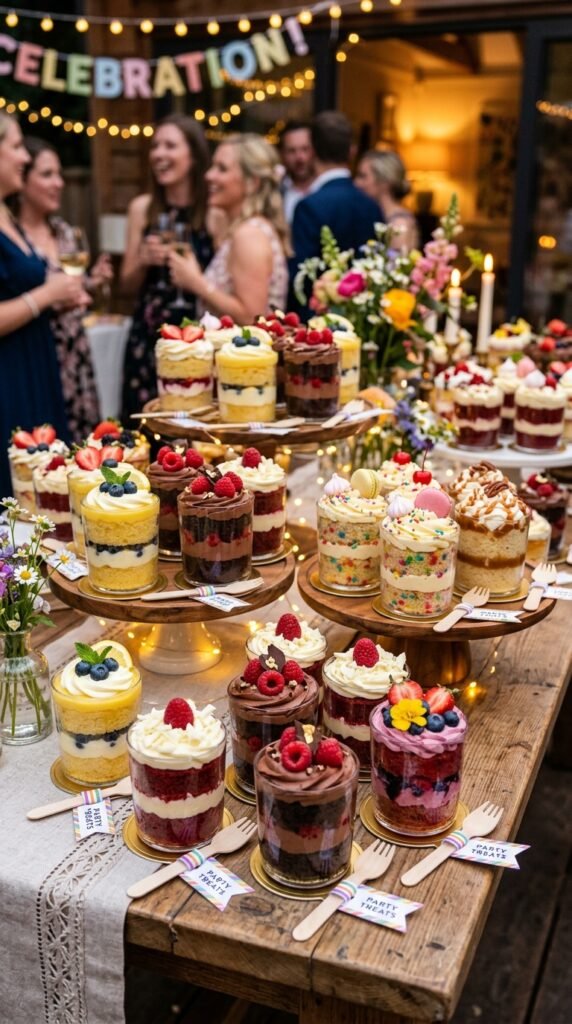
- Customization: Don’t be afraid to try different flavor combinations. Use a chocolate cake with strawberry frosting, or a lemon cake with blueberry frosting. The sky’s the limit!
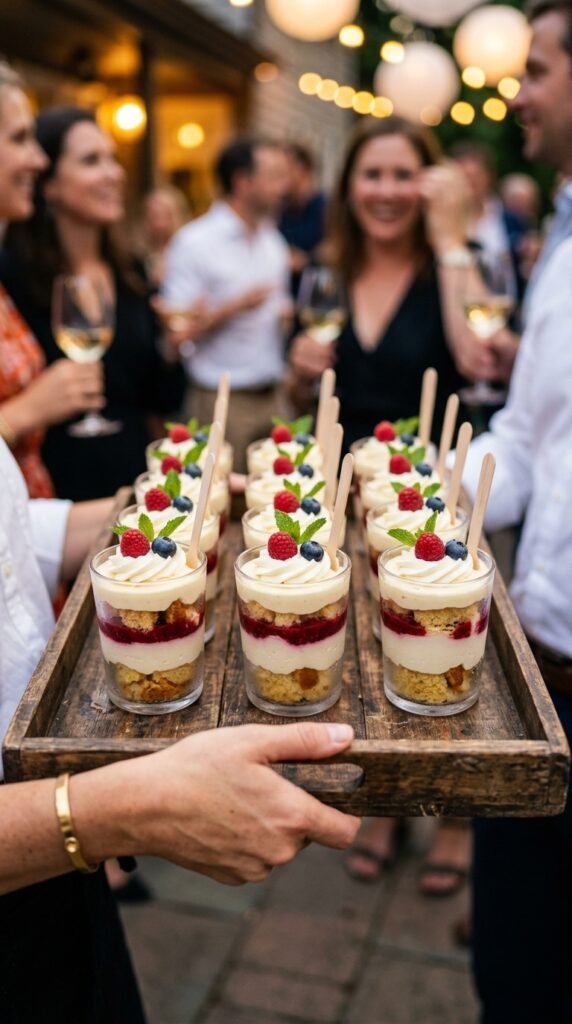
- Presentation: For an extra special touch, use clear cups or mason jars to showcase the layers. These cups look especially beautiful when served at a party or special event.
- Mini Size: For individual servings, consider using mini cups. These bite-sized treats are easy to grab and eat, and they’re perfect for portion control.
Conclusion
Cake dessert cups with layers are a fun and customizable treat that will wow your guests and satisfy your sweet cravings. With endless flavor combinations, you can create a dessert that suits any occasion. Whether it’s for a birthday, a family dinner, or a simple afternoon treat, these layered delights are bound to be a hit.
Save this recipe for later and get creative with your own flavor combinations! Happy baking!

Leave a Reply