
Nothing impresses guests or satisfies a sweet tooth quite like a chocolate dessert cup. These delightful treats are perfect for parties, special occasions, or even a cozy night in. The best part? They’re deceptively easy to make but look incredibly fancy. Imagine smooth, velvety chocolate filled with a delicious cream or mousse, all served in a cute edible cup. It’s like a mini indulgence you can hold in your hand!
Let’s dive into how to create these elegant little bites that are guaranteed to wow your friends and family. Follow this simple step-by-step guide and you’ll be whipping up these chocolate dessert cups like a pro.
Ingredients You’ll Need
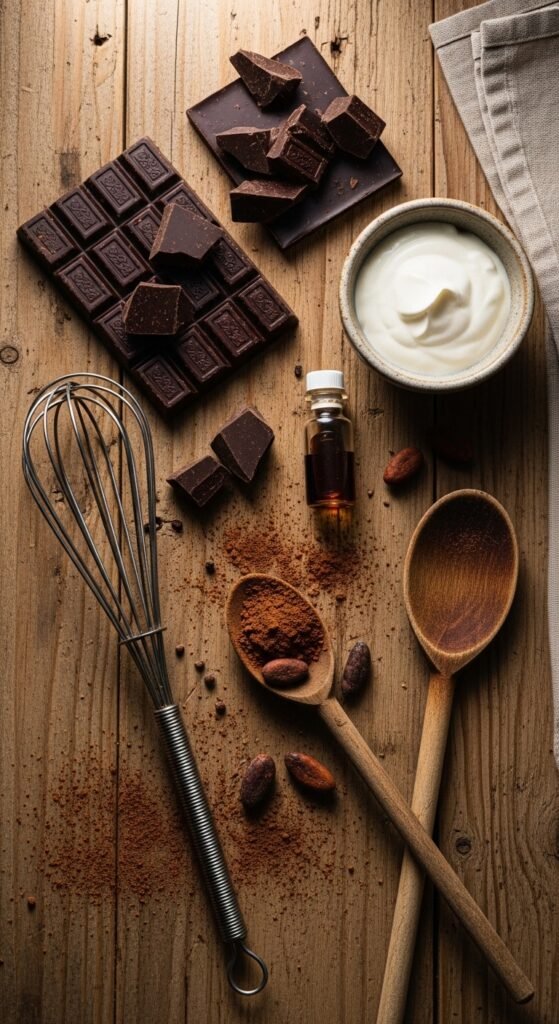
Before getting started, gather the ingredients for the chocolate cups and the filling. You can use these ingredients to make both the cups and the creamy filling:
For the Chocolate Cups:
- 8 oz (225g) dark or milk chocolate (your choice)
- Silicone cupcake or mini muffin molds (for shaping the cups)
- Optional: a touch of vegetable oil to make the chocolate glossier
For the Filling:
- 1 cup heavy cream
- 8 oz (225g) cream cheese, softened
- 1/2 cup powdered sugar
- 1 tsp vanilla extract
- Optional: fresh berries, mint, or whipped cream for garnish
Step 1: Making the Chocolate Cups
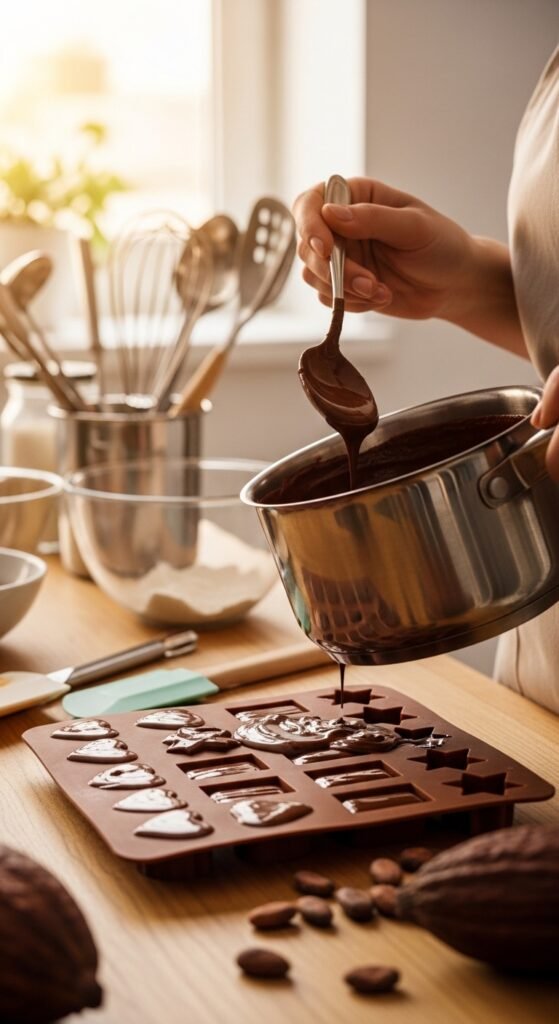
- Melt the Chocolate: Start by melting the chocolate. You can do this in a microwave-safe bowl in 30-second intervals, stirring in between. Alternatively, use a double boiler to gently melt the chocolate, making sure it doesn’t burn. If you want a shinier finish, add a teaspoon of vegetable oil to the melted chocolate.
- Coat the Molds: Take your silicone molds (cupcake or mini muffin molds work great), and carefully spoon or pour the melted chocolate into each mold. Use the back of a spoon to spread the chocolate evenly around the edges. Make sure the molds are well-coated—this will give you a sturdy, crisp chocolate shell.
- Chill: Once the molds are coated, place them in the fridge for at least 30 minutes to allow the chocolate to harden. You can also freeze them for quicker results.
Step 2: Prepare the Creamy Filling
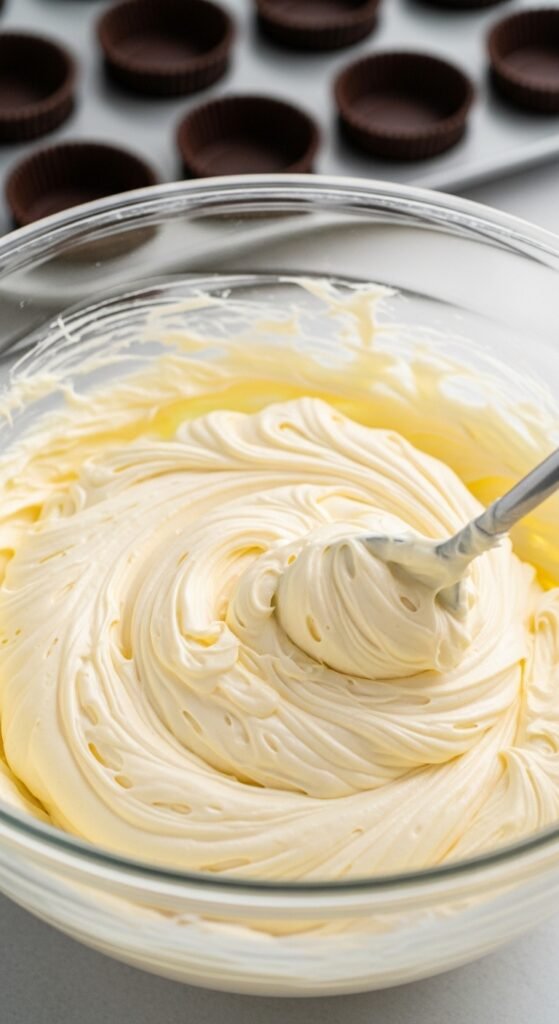
- Whip the Cream: In a mixing bowl, whip the heavy cream until stiff peaks form. This will give your filling a light, airy texture.
- Cream Cheese Mixture: In another bowl, beat the softened cream cheese and powdered sugar until smooth. Add the vanilla extract for that extra flavor boost.
- Combine: Gently fold the whipped cream into the cream cheese mixture. Be careful not to deflate the whipped cream—this will help keep the filling light and fluffy.
- Taste Test: Give it a little taste to see if you’d like to add more sweetness or vanilla. If you’re feeling adventurous, you could even add a tablespoon of cocoa powder or melted chocolate to intensify the flavor.
Step 3: Assemble the Chocolate Dessert Cups
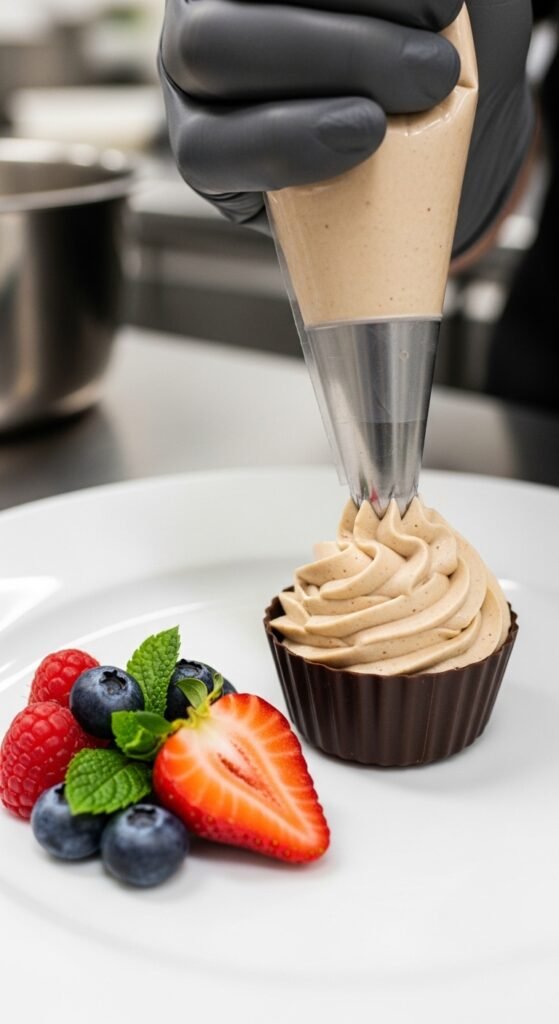
- Fill the Chocolate Shells: Once the chocolate cups are completely set, carefully remove them from the molds. Gently press the sides of the silicone mold to release the chocolate. Once you have your chocolate cups, fill them with the creamy filling using a spoon or piping bag for precision.
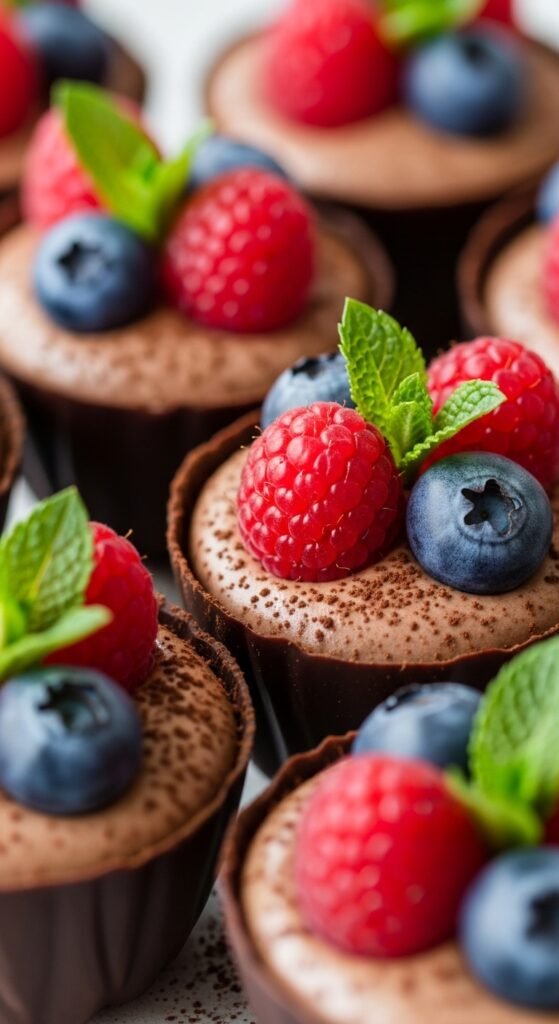
- Top Them Off: Garnish each chocolate dessert cup with your choice of toppings. Fresh berries, mint leaves, or even a dollop of whipped cream can add a pop of color and flavor. Get creative here—these little cups are a canvas for whatever you fancy!
Step 4: Enjoy!
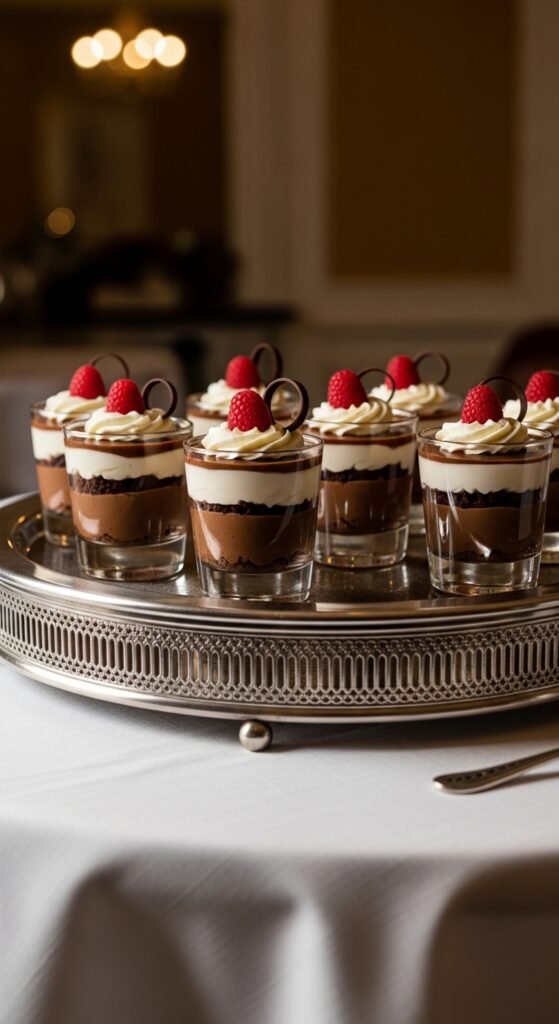
Now comes the best part—digging in! Serve your chocolate dessert cups as individual servings. These little bites of heaven are rich, decadent, and perfect for any occasion.
You can store them in the fridge for up to 2 days, but they’re best enjoyed fresh to maintain that melt-in-your-mouth chocolate texture.
Takeaway
Chocolate dessert cups are a simple yet impressive treat to make, and they never fail to leave a lasting impression. Whether you’re hosting a dinner party or treating yourself, these little bites of indulgence are the perfect way to showcase your dessert-making skills. Don’t forget to snap a photo and share your creation—you’ve earned it!
Save this recipe for later and start experimenting with different fillings and toppings! You’ll be making fancy chocolate cups in no time.

Leave a Reply