
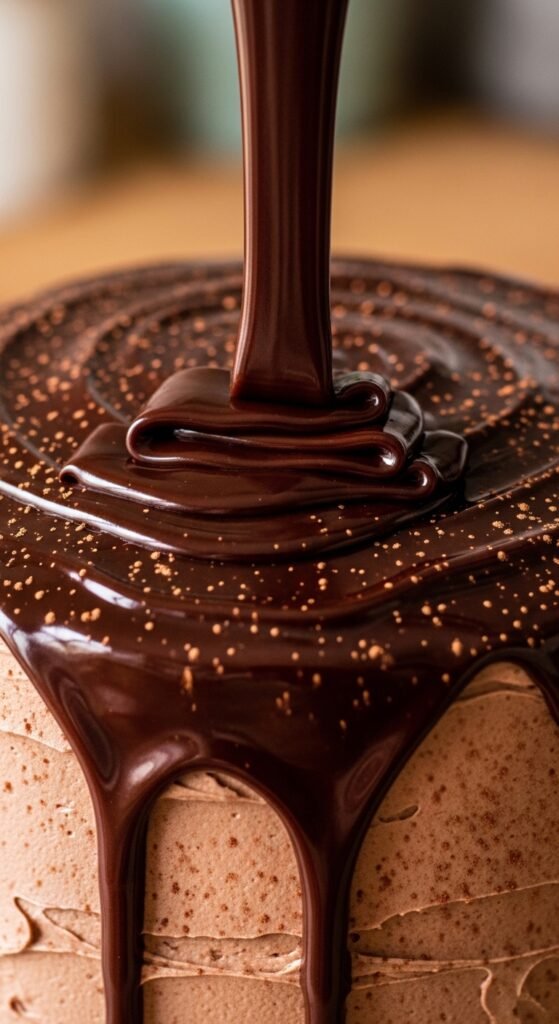
There’s something magical about a glossy chocolate drizzle cascading over a cake or plate. It turns a simple dessert into something that looks straight out of a bakery window. The best part? You don’t need fancy tools or chef-level skills to make it happen.
Whether you’re decorating brownies, cookies, cupcakes, or even fruit, learning how to make chocolate drizzle that looks professional is easier than you think. With the right texture and a few simple tricks, your desserts will look polished and photo-ready every single time.
Let’s break it down step by step.
Choose the Right Chocolate
Great drizzle starts with great chocolate. The type you use affects shine, texture, and taste.
You can use:
- Semi-sweet chocolate chips
- Dark chocolate bars (chopped)
- Milk chocolate
- White chocolate
For the smoothest finish, chocolate bars usually melt better than chips because they contain fewer stabilizers. But chips still work well for quick projects.
If you want extra shine and smoothness, add:
- 1–2 teaspoons of coconut oil
- Or 1 teaspoon of butter
This helps thin the chocolate slightly and creates that glossy, professional look.

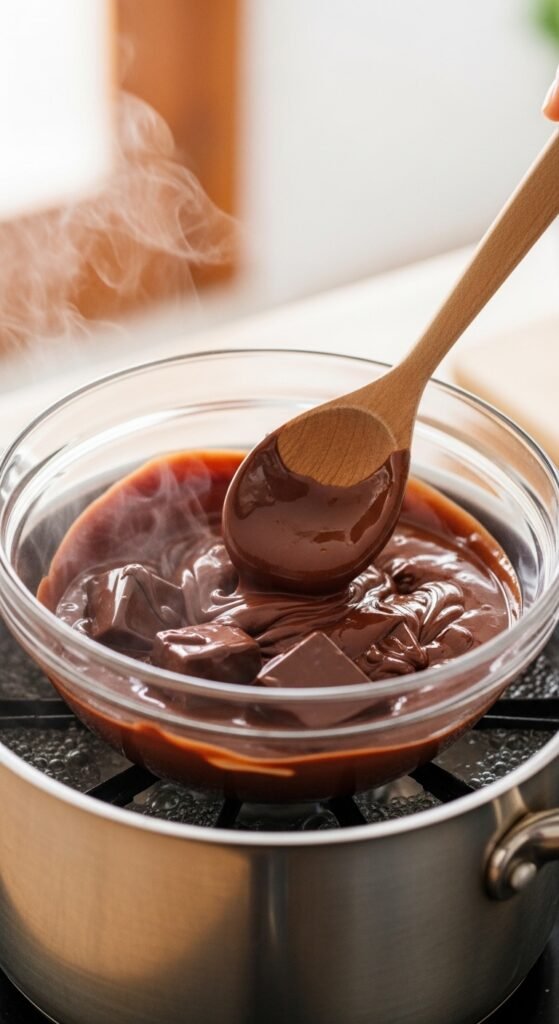
Melt the Chocolate the Right Way
Melting chocolate properly makes all the difference. Burnt or thick chocolate will never drizzle nicely.
Option 1: Microwave Method (Quick & Easy)
- Place chocolate in a microwave-safe bowl.
- Heat for 20–30 seconds.
- Stir well.
- Repeat in short bursts until smooth.
Always stir between intervals. Chocolate holds its shape even when melted, so stirring prevents overheating.
Option 2: Double Boiler Method (More Control)
- Fill a pot with 1–2 inches of water.
- Place a heatproof bowl on top (not touching water).
- Add chocolate and stir until melted.
This method gives you gentle, even heat and reduces the risk of burning.
Get the Perfect Drizzle Consistency
This step is key. The chocolate must be thin enough to flow, but thick enough to hold its shape.
Here’s how to check:
- Lift a spoon and let chocolate fall back into the bowl.
- It should flow smoothly in a thin ribbon.
- It shouldn’t clump or break.
If it’s too thick:
- Add ½ teaspoon coconut oil at a time.
- Stir well before adding more.
If it’s too thin:
- Let it cool for a minute or two.
- Stir gently until slightly thicker.
Professional-looking drizzle depends on this balance.
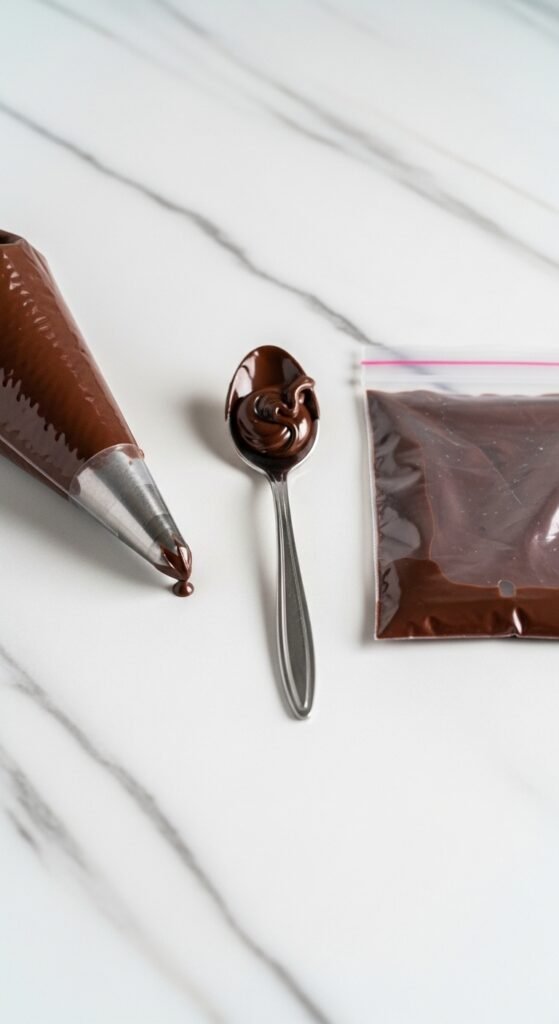
Tools That Make Drizzling Easy
You don’t need special equipment, but a few simple tools help create clean lines.
Best options:
- Spoon (for casual drizzle)
- Fork (for thin stripes)
- Piping bag
- Zip-top plastic bag (snip a tiny corner)
- Squeeze bottle
For sharp, neat lines, a piping bag or plastic bag works best. For rustic style, use a spoon and let it fall naturally.
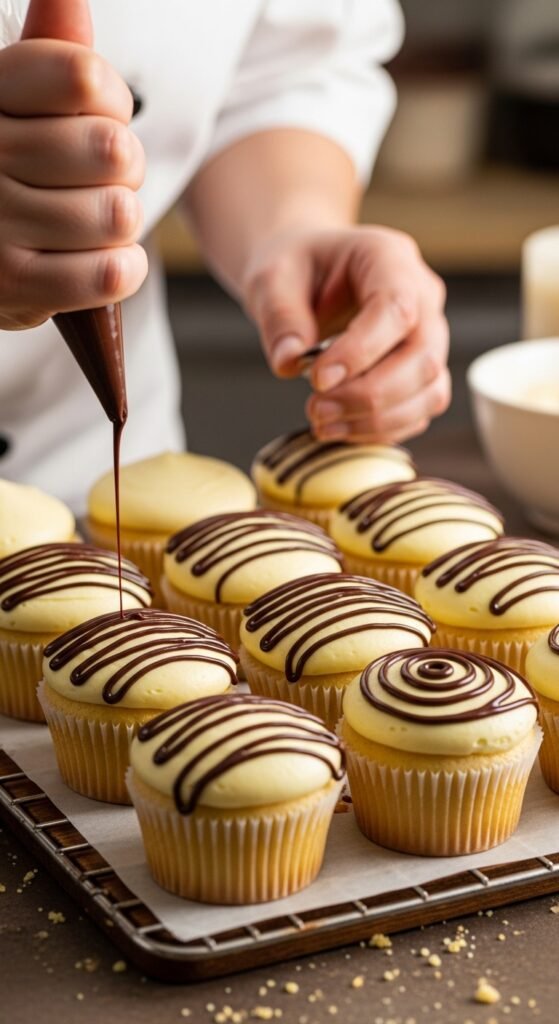
How to Drizzle Like a Pro
Now comes the fun part!
Step 1: Prepare Your Surface
- Make sure cakes or pastries are cooled.
- If frosting, chill it first.
- Place parchment paper under your dessert to catch extra drips.
Step 2: Test First
Always test drizzle on parchment paper before applying to your dessert. This helps you check flow and thickness.
Step 3: Create Motion
- Hold your spoon or piping bag above the dessert.
- Move your hand side to side quickly.
- Let chocolate fall naturally.
Don’t move too slowly. Fast, light motion creates elegant thin lines.
For dramatic cake drips:
- Spoon chocolate along the edge.
- Gently push some over the side.
- Let gravity do the work.
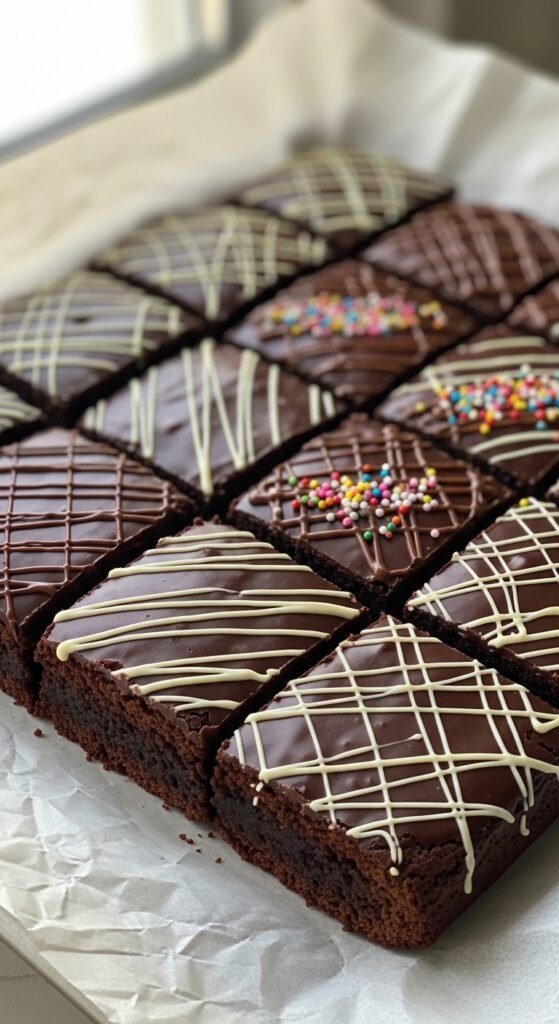
Make It Extra Fancy
Want to level up your drizzle? Try these creative ideas:
- Combine dark and white chocolate drizzles
- Sprinkle sea salt on top
- Add crushed nuts
- Use edible gold dust
- Drizzle over strawberries or popcorn
Layering colors creates contrast and depth. Just let the first layer set slightly before adding another.
Professional bakers often keep designs simple. Clean lines always look more elegant than messy ones.
Let It Set Properly
Once you’ve finished drizzling, allow the chocolate to set.
- Room temperature: 20–30 minutes
- Refrigerator: 10–15 minutes
Avoid touching the drizzle while it sets. This keeps the shine intact.
If you used coconut oil, it will firm up nicely and hold shape beautifully.
Common Mistakes to Avoid
Even simple drizzle can go wrong. Here’s what to watch for:
- Overheating chocolate (causes grainy texture)
- Drizzling on warm frosting (melts design)
- Using thick chocolate without thinning
- Holding tool too close to dessert
Small adjustments make a big difference.
Final Thoughts
Making chocolate drizzle that looks professional isn’t about perfection. It’s about texture, timing, and confidence. Once you get the consistency right, everything else becomes easy and fun.
Start simple. Practice on parchment paper. Experiment with different patterns. Soon, your desserts will look bakery-worthy without any stress.
So grab your chocolate, melt it slowly, and let it flow. And don’t forget — save this recipe for later!

Leave a Reply