
There’s nothing more satisfying than lifting a dessert bar from the pan and seeing sharp, bakery-style edges instead of crumbs and cracks. Clean slices instantly make homemade treats look polished, Pinterest-worthy, and ready to share. The good news? You don’t need fancy tools or professional training—just a few smart techniques that make all the difference.
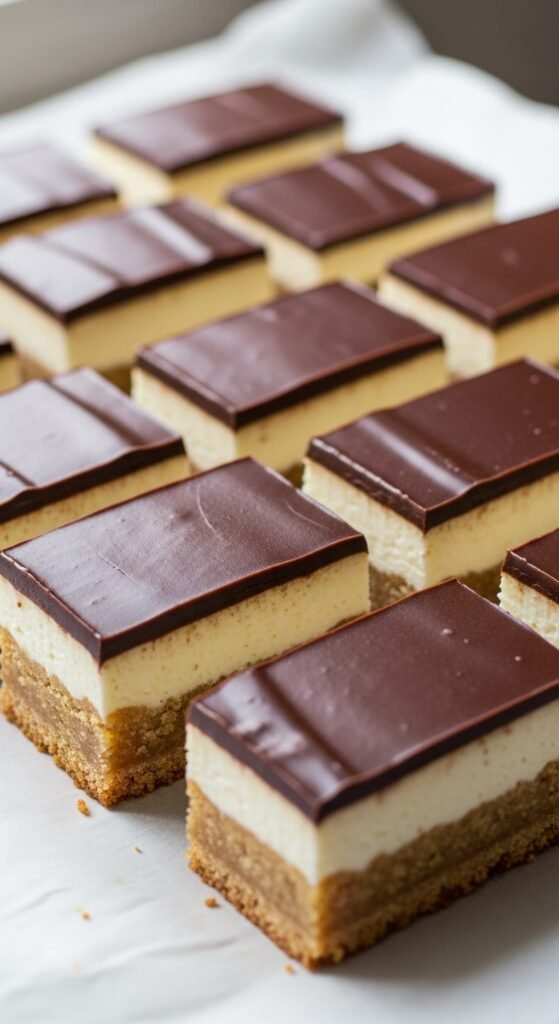
Below, you’ll learn exactly how to make dessert bars that cut beautifully every time, from pan prep to the final slice.
Start With the Right Pan and Lining
Clean slices begin before you even mix ingredients. The pan you choose—and how you prepare it—sets the foundation.
Pan tips that matter:
- Use metal pans for most dessert bars. They heat evenly and create firmer edges than glass.
- Choose a light-colored pan to avoid over-browning.
- Square or rectangular pans with straight sides give the cleanest corners.
Always line your pan:
- Line with parchment paper, leaving overhang on two sides.
- Press parchment tightly into corners so batter doesn’t sneak underneath.
- Lightly grease the parchment for easy release.
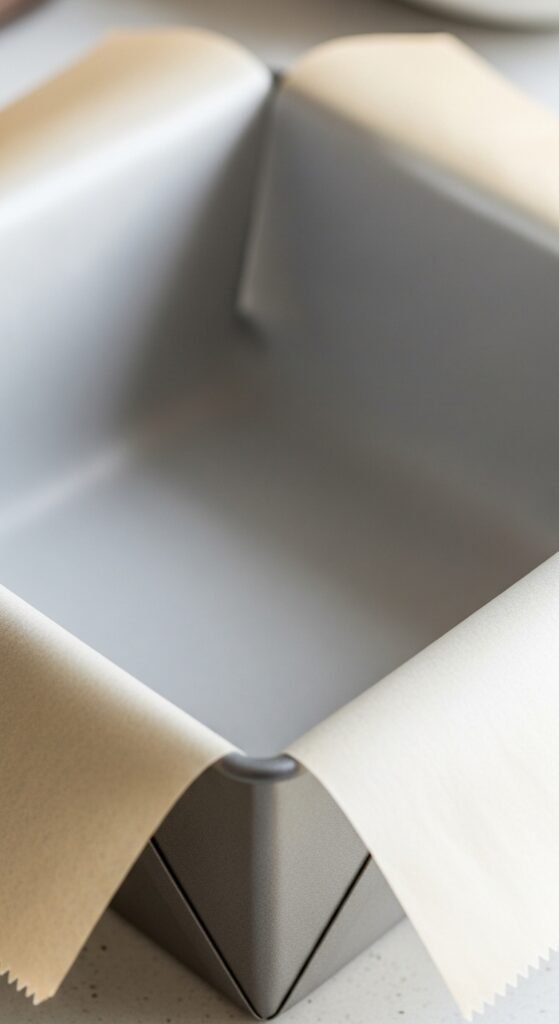
This step alone can transform messy bars into perfectly lifted slabs.
Measure and Layer With Intention
Even layers equal even slices. When bars bake unevenly, they crumble where thickness changes.
For crusts and bases:
- Press crusts firmly using the bottom of a measuring cup.
- Make sure corners are fully compacted.
- Chill crusts briefly before adding fillings to lock them in place.
For layered bars:
- Spread fillings gently with an offset spatula.
- Tap the pan lightly on the counter to level layers.
- Avoid overloading the pan—too much filling leads to sliding layers.
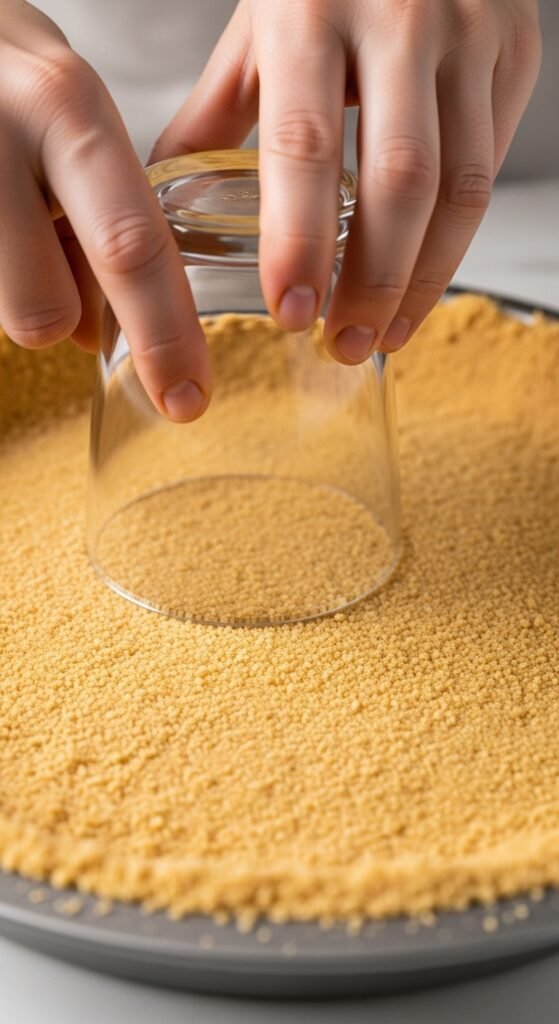
Think flat, firm, and even at every stage.
Bake Until Set—Not Just Golden
One of the biggest reasons dessert bars don’t slice cleanly is underbaking. A golden top doesn’t always mean the center is ready.
How to know they’re done:
- Centers should look set, not jiggly.
- Edges should pull slightly away from the pan.
- A light press on top should spring back gently.
If your bars include custard-style or creamy layers:
- They should wobble slightly as a whole, not ripple in the center.
- Cooling will finish the setting process.

Resist the urge to cut too soon—this step pays off later.
Cool Completely (Yes, Completely)
Warm bars are soft bars. Soft bars crumble.
Cooling rules to follow:
- Let bars cool fully at room temperature.
- For ultra-clean cuts, chill in the fridge for 1–2 hours after cooling.
- Cold bars hold their structure and slice like a dream.
If you’re short on time:
- Place the pan on a wire rack near an open window.
- Avoid moving or cutting while still warm.
Patience here equals perfection later.
Use the Right Knife and Technique
Your cutting method matters just as much as the recipe.
Best slicing tools:
- A long, sharp chef’s knife
- A thin-bladed slicing knife
Cutting tips for clean edges:
- Wipe the blade clean between every cut.
- For extra neat slices, dip the knife in hot water and wipe dry.
- Cut straight down—don’t drag the knife back and forth.
For bars with sticky toppings:
- Chill longer before slicing.
- Use parchment overhang to lift bars out before cutting.
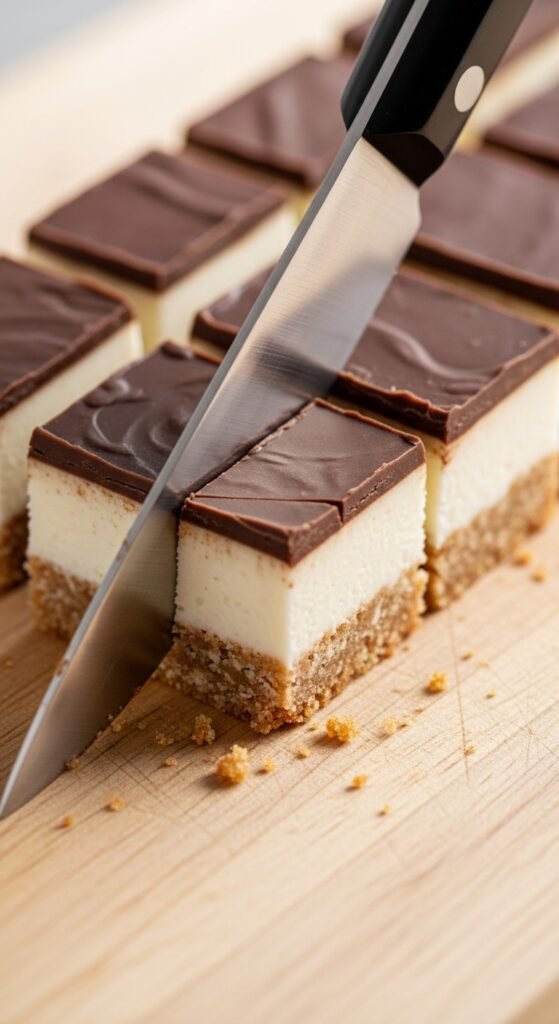
This small habit instantly upgrades how your bars look.
Portion Like a Pro
Consistent sizing makes dessert bars look intentional and polished.
Easy portioning tips:
- Use a ruler or lightly score the surface before cutting.
- Start by cutting the slab in half, then quarters, then smaller pieces.
- Wipe the knife often to maintain clean lines.
Uniform slices photograph better, store better, and serve beautifully.
Common Mistakes to Avoid
Even experienced bakers slip up. Watch out for these common issues:
- Cutting while warm
- Skipping parchment lining
- Overbaking edges while centers stay soft
- Using a dull knife
- Overloading layers
Fixing just one of these can dramatically improve your results.
Final Takeaway
Perfectly sliced dessert bars aren’t about luck—they’re about smart steps. From lining your pan and leveling layers to chilling fully and slicing with care, each small choice adds up to clean, bakery-style results.
Save this guide for later, and the next time you bake dessert bars, enjoy those smooth edges and crumb-free slices you’ll be proud to share.

Leave a Reply