
Are you ready to impress your friends and family with a dessert board that’s not just delicious but also Instagram-worthy? Dessert boards are the ultimate way to showcase a variety of treats in one stunning display. Whether you’re hosting a party, a get-together, or just indulging in a sweet moment, a dessert board is guaranteed to go viral—if done right! In this article, we’ll break down the steps to create the perfect dessert board that will have everyone reaching for their phones before they reach for a bite.
Step 1: Choose Your Board
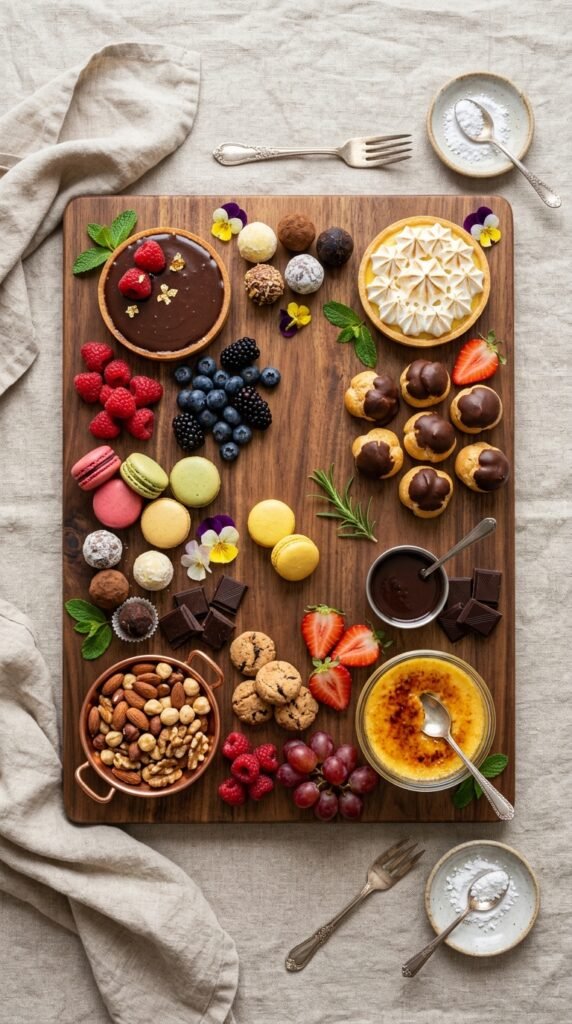
The base of any great dessert board is, of course, the board itself. Whether you use a wooden board, a marble platter, or a sleek slate tray, the size and shape of the board set the stage for your creations. A large rectangular or round board works best, depending on the number of desserts you want to include. Make sure the board is big enough to arrange everything comfortably but not too large that it becomes overwhelming.
Step 2: Select Your Desserts
Now comes the fun part—choosing the sweets that will make your board the star of the show. Here are a few dessert categories to consider:
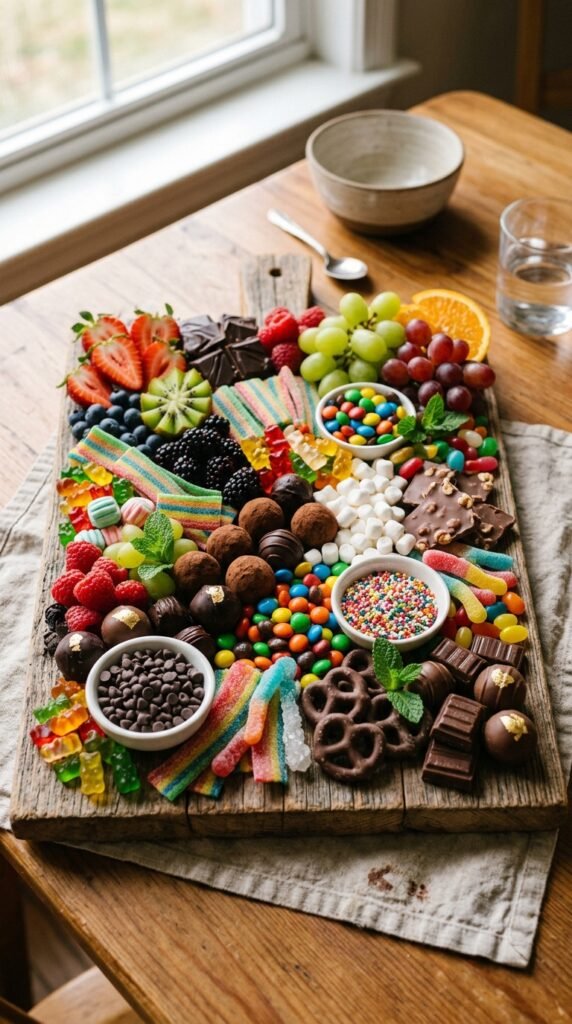
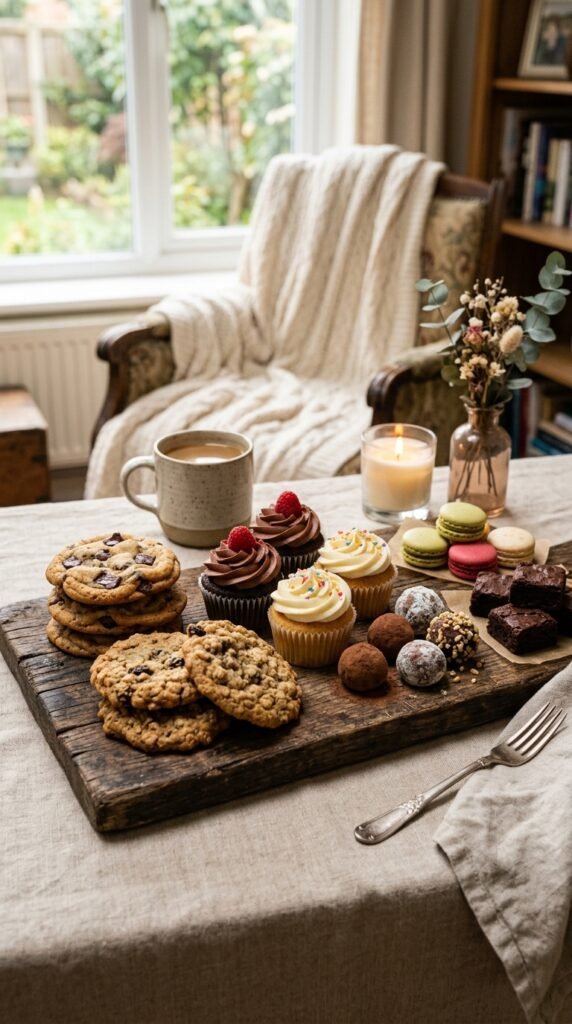
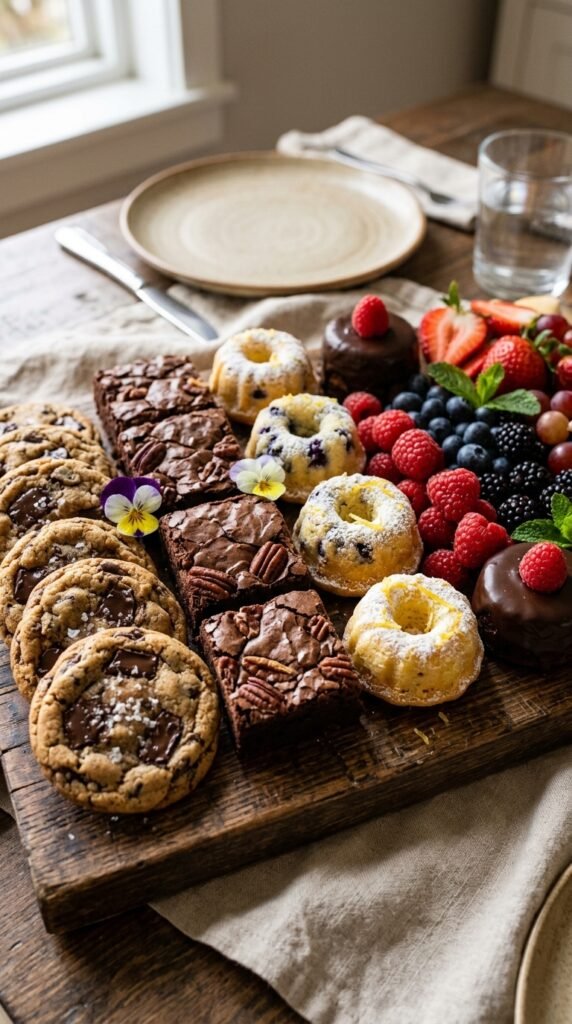
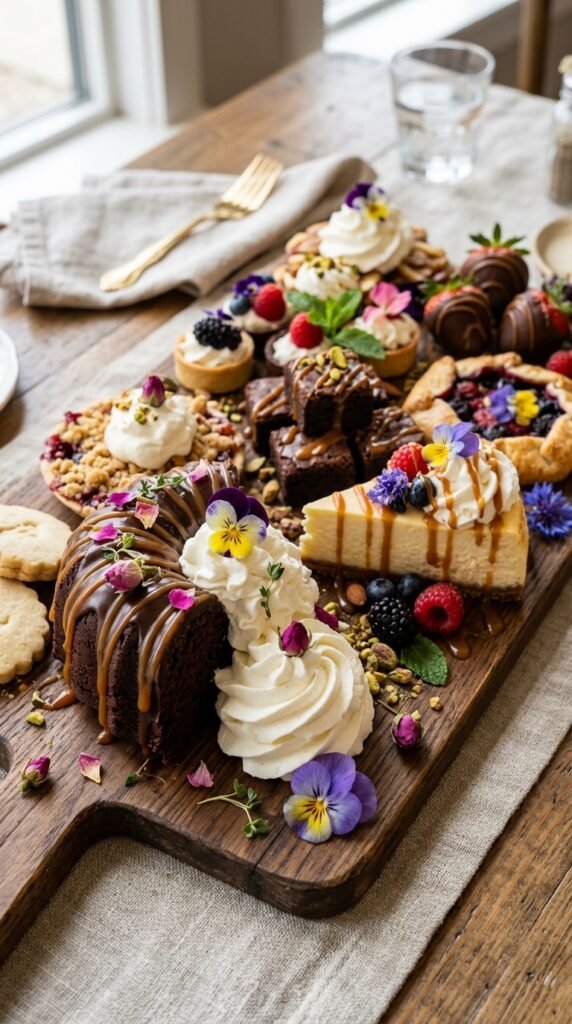
- Baked Goods: Think cookies, brownies, mini cakes, and cupcakes. These are your crowd-pleasers.
- Fresh Fruits: Berries, grapes, apple slices, or figs add a fresh, colorful contrast to the sweeter treats.
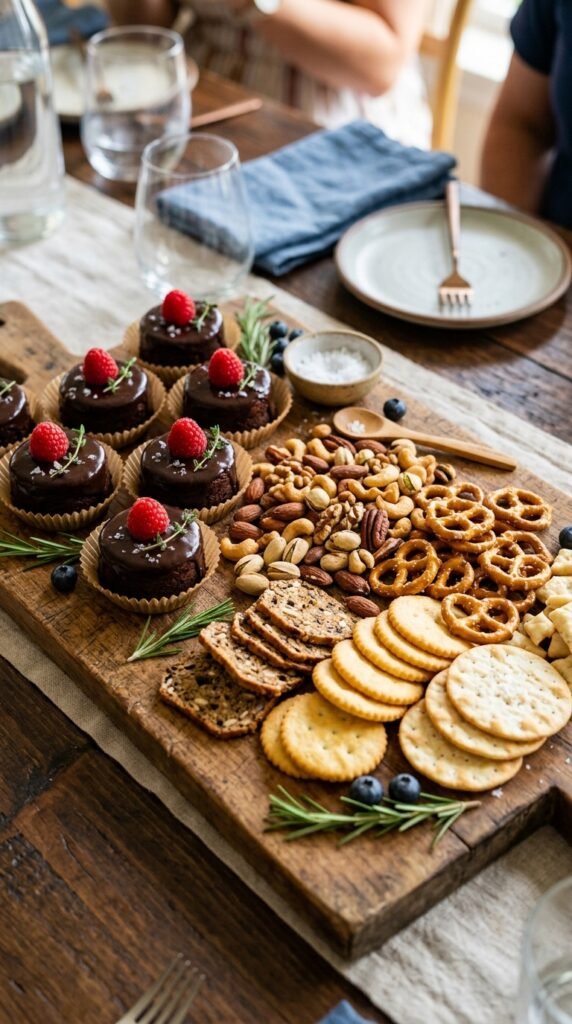
- Chocolate: Include a variety of chocolate—dark, milk, and white—along with chocolate-covered fruits or pretzels.
- Cheese & Pairings: Cheese might seem unconventional, but when paired with fruits like pears or figs and a drizzle of honey, it adds a delightful balance to the sweetness.
Step 3: Add Texture with Nuts and Snacks
To add texture and depth to your dessert board, consider incorporating crunchy elements like:
- Nuts: Almonds, walnuts, or pecans provide a savory contrast.
- Pretzels: Soft, salted pretzels can create a playful and salty touch against the sweet options.
- Crackers: A few delicate crackers can enhance both the aesthetic and the flavor.
The key here is balance—adding a mix of textures will keep your guests engaged as they explore different flavors with each bite.
Step 4: Arrange the Desserts
Now, it’s time to get creative with the layout. The presentation of your dessert board is what will truly make it stand out. Follow these tips for arranging everything beautifully:
- Start with large items: Place the larger desserts like cakes, cupcakes, or cookies first, spreading them out across the board.
- Add smaller treats next: Fill in the spaces with smaller items like chocolates, fruit, or nuts.
- Balance colors and shapes: Try to distribute similar colors and shapes evenly throughout the board. For example, group similar fruits together for visual balance, or alternate between chocolate and lighter-colored desserts.
- Leave empty space: Don’t overcrowd the board. Empty spaces make the board feel more elegant and allow each item to shine.
Step 5: Add Final Touches
The final step in creating a viral dessert board is all about those small finishing touches that elevate the look and taste. Here are some ideas:
- Drizzles & Sauces: A drizzle of caramel, chocolate syrup, or whipped cream adds visual interest and flavor.
- Edible Flowers: Place a few edible flowers for a pop of color and a gourmet look.
- Sprinkles & Gold Leaf: For that extra luxurious touch, consider adding edible gold leaf or colorful sprinkles.
These little details make your dessert board more than just a snack—it becomes a true masterpiece.
Step 6: Serve and Enjoy
Once your dessert board is arranged to perfection, it’s time to serve it! Make sure to have small plates, napkins, and maybe even some serving tongs available for your guests. Be sure to take plenty of photos before the board is devoured—you’ll want to remember this beautiful creation for years to come!
Conclusion
Creating a dessert board that goes viral is all about balance, creativity, and attention to detail. By choosing a variety of delicious treats, arranging them thoughtfully, and adding a few elegant touches, you’ll have a dessert spread that is not only tasty but also visually stunning. So, what are you waiting for? Start building your own viral dessert board today—and don’t forget to take some pictures for your social media!
Save this idea for later and get ready to wow your guests at your next gathering!

Leave a Reply