
Dessert jars have taken over Pinterest for a reason. They’re cute, portable, customizable, and surprisingly easy to make at home. Whether you’re prepping treats for a party, gifting something sweet, or just want desserts that look as good as they taste, dessert jars are the answer.
The secret isn’t fancy tools or complicated recipes. It’s all about layers, texture, and presentation.
In this guide, you’ll learn exactly how to build dessert jars that feel polished, balanced, and totally Pinterest-worthy—without stress.
Choose the Right Jars for Visual Impact
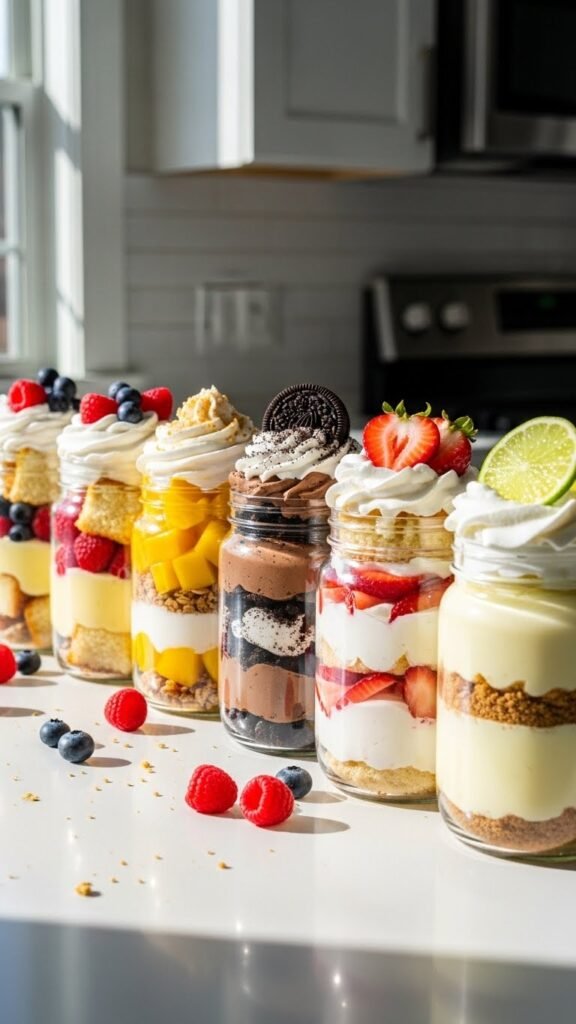
Before you even think about recipes, start with the container. The jar sets the stage for everything inside.
Clear glass is key. It lets those layers shine.
Popular options include:
- Small mason jars
- Weck jars
- Mini yogurt jars
- Straight-sided glass cups
Pro tips:
- Stick to jars between 4–8 ounces for best proportions
- Wide mouths make layering cleaner
- Matching jars look more polished in photos
If you’re serving a crowd, consistency matters. For gifting, charm matters more than size.
Pick a Simple Base Dessert Formula
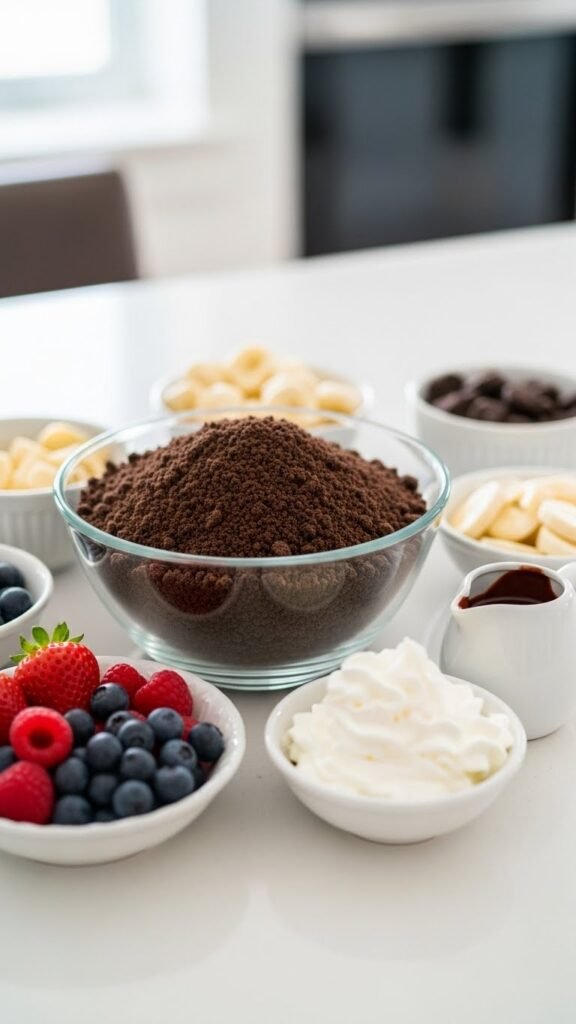
Pinterest-perfect dessert jars usually follow one easy formula. You don’t need dozens of ingredients—just smart combinations.
A classic jar includes:
- A base: cake crumbs, cookies, brownie pieces, or biscuit crumbs
- A creamy layer: whipped topping, pudding, cream cheese filling, or custard
- A flavor layer: fruit compote, chocolate spread, caramel-style sauce, or jam
Stick to flavors that complement each other. Think contrast, not competition.
Great beginner combinations:
- Chocolate cake + vanilla cream + berries
- Biscuit crumbs + lemon cream + fruit topping
- Brownie bits + chocolate cream + nut sprinkle
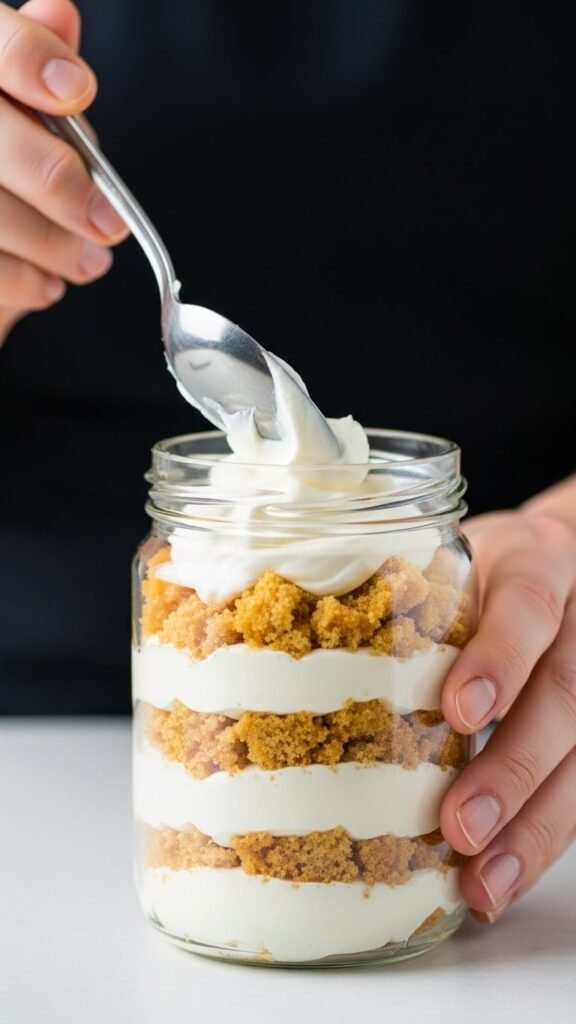
Master Clean, Even Layers
This is where the Pinterest magic really happens.
Clean layers make dessert jars look intentional instead of messy.
How to get perfect layers:
- Use a spoon or piping bag for creamy layers
- Gently tap the jar after each layer to level it
- Wipe the inside rim if anything smudges
Layering order matters:
- Start with something sturdy at the bottom
- Add soft layers in the middle
- Finish with the prettiest layer on top
Aim for visible contrast. Light next to dark. Smooth next to crumbly. That’s what catches the eye.
Add Texture for a Professional Look
The best dessert jars don’t rely on cream alone. Texture makes them feel thoughtful and indulgent.
Easy texture boosters:
- Crushed cookies or biscuits
- Toasted coconut
- Chopped nuts
- Chocolate shavings
- Crisp crumble toppings
Sprinkle small amounts between layers or use them as a finishing touch.
This keeps every bite interesting and prevents the dessert from feeling too soft or one-note.
Decorate the Top Like a Stylist
The top of the jar is what gets noticed first—especially in photos.
Keep it simple but intentional.
Topping ideas:
- A swirl of whipped topping
- Fresh fruit slices
- A dusting of cocoa or powdered sugar
- Cookie crumbs or chocolate curls
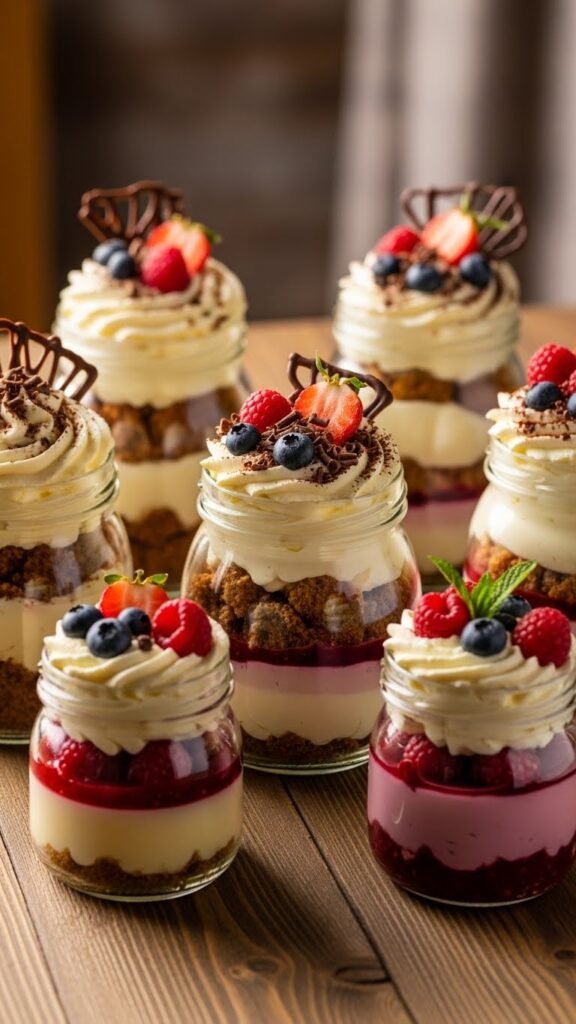
Avoid overcrowding. One or two elements look cleaner than five.
If you’re photographing them, natural light and a neutral background make a huge difference.
Chill, Store, and Serve with Confidence
Dessert jars aren’t just pretty—they’re practical.
Storage tips:
- Chill jars for at least 1–2 hours before serving
- Keep lids on until ready to display
- Most jars stay fresh for 2–3 days when refrigerated
For events:
- Assemble jars the night before
- Add delicate toppings just before serving
- Keep them cold until presentation time
They’re perfect for parties, picnics, bake sales, or casual treats at home.
Make Them Feel Extra Special
Small details elevate dessert jars from “nice” to “wow.”
Try:
- Ribbon or twine around the lid
- Handwritten tags
- Coordinated color themes
- Seasonal ingredients
You don’t need to spend more—just be intentional.
Pinterest-perfect desserts are about clarity, balance, and charm, not complexity.
Final Takeaway
Dessert jars are proof that beautiful desserts don’t have to be complicated. With the right jars, simple layers, and thoughtful finishing touches, you can create treats that look bakery-worthy right from your kitchen.
Once you make one batch, you’ll start seeing endless flavor possibilities.
Save this guide for later and start building your own Pinterest-perfect dessert jars today.

Leave a Reply