
There’s something oddly satisfying about a dessert parfait. Those clean, colorful layers stacked in a glass feel fancy, effortless, and totally Pinterest-worthy—all at the same time. The best part? You don’t need baking skills or special tools to pull them off. With the right order, textures, and a few simple tricks, you can create dessert parfaits that look bakery-level and taste even better.
Whether you’re making them for a party, a brunch table, or a cozy night treat, this guide will walk you through exactly how to build parfaits with perfectly defined layers—every single time.
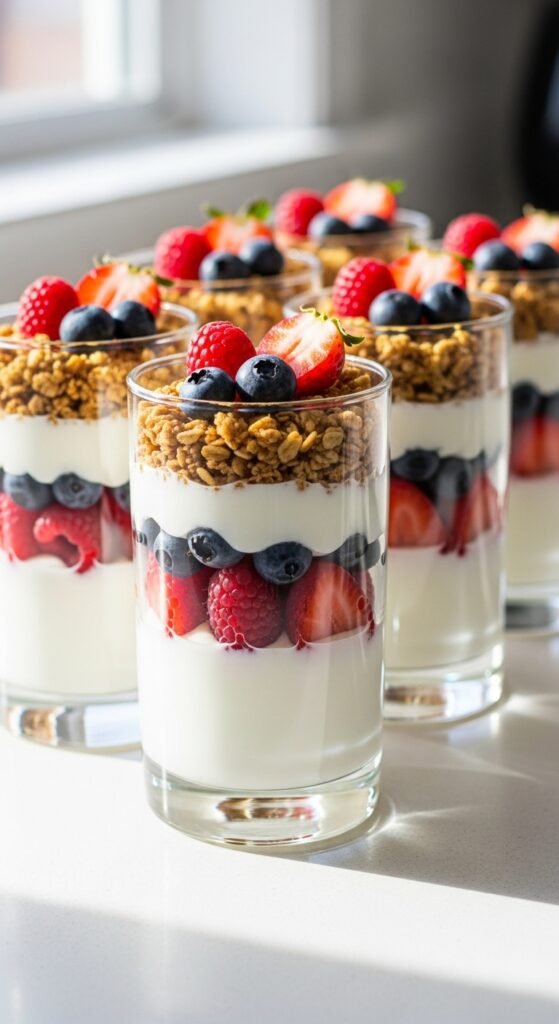
Choose the Right Glass for Clean Layers
Before you even think about ingredients, start with the container. Clear glasses are non-negotiable if you want that layered look to shine.
Best options include:
- Straight-sided glasses
- Small mason jars
- Stemless dessert cups
- Short tumblers
Avoid glasses that flare outward too much. Straight sides help layers stack evenly and stay visible from top to bottom.
Pro tip: Smaller glasses make layering easier and prevent ingredients from sliding around.
Pick Ingredients with Contrast in Mind
Perfect layers come from contrast—in color, texture, and thickness. When everything looks or feels the same, layers blur together.
A balanced parfait usually includes:
- Creamy layer: yogurt, whipped cream, custard, pudding, or mascarpone
- Crunchy layer: crushed cookies, granola, toasted oats, or crumble
- Fresh or soft layer: berries, sliced fruit, fruit compote, or puree

Try to alternate light and dark colors for visual pop—think white cream, red fruit, golden crumble.
Prep Everything Before You Start Layering
This step is what separates clean layers from messy ones. Once you start assembling, you don’t want to stop and prep mid-way.
Before layering:
- Wash and slice fruit evenly
- Chill creamy components so they’re thick
- Crush crunchy elements into uniform pieces
- Spoon softer fillings into piping bags or zip-top bags (optional but helpful)
Thicker ingredients hold their shape better and won’t seep into other layers.
Build Parfaits in the Right Order
Layer order matters more than you think. A good rule of thumb is firm to soft, repeating as you go.
A classic layering sequence:
- Crunchy base (for structure)
- Creamy layer (acts as a barrier)
- Fruit or soft filling
- Repeat until the glass is full

Use a spoon or piping bag and gently spread each layer to the edges of the glass. Wipe the inside rim with a clean towel if needed—tiny smudges are very noticeable.
Master the Clean Layer Technique
This is the secret sauce to parfait perfection.
Tips for sharp, defined layers:
- Add layers slowly—don’t dump ingredients in
- Use the back of a spoon to smooth each layer
- Chill for 10–15 minutes between layers if working with very soft fillings
- Keep layers roughly the same thickness for balance
If you want ultra-clean lines, piping bags are your best friend. They give you control and reduce drips along the glass.
Finish with a Show-Stopping Top Layer
The top layer is what catches the eye first, so make it count.
Great finishing ideas:
- Swirls of whipped cream
- A neat pile of fruit slices
- A sprinkle of crumble or chocolate shavings
- A drizzle of sauce right before serving

Keep toppings light so they don’t weigh down the layers below.
Make-Ahead Tips for Stress-Free Serving
Dessert parfaits are perfect for prepping ahead—just do it smartly.
Make-ahead best practices:
- Assemble up to 12 hours in advance
- Store covered in the fridge
- Add crunchy toppings right before serving
- Keep fruit layers well-drained to avoid excess moisture
This makes them ideal for parties, brunch spreads, or dessert tables where presentation matters.
Common Mistakes to Avoid
Even simple desserts have pitfalls. Watch out for these:
- Overfilling the glass
- Using runny fillings
- Skipping the crunchy base
- Rushing the layering process
Slow, intentional layering always wins.
Final Thoughts
Dessert parfaits prove that simple ingredients can look stunning with the right technique. Once you understand layering order, texture balance, and a few clean-up tricks, you’ll be able to create flawless parfaits for any occasion—no stress required.
Save this guide for later and start building your own perfectly layered desserts that look as good as they taste!

Leave a Reply