
There’s something so satisfying about dessert squares with sharp, perfect edges. No crumbling corners. No sticky knife marks. Just neat, bakery-style pieces that look almost too pretty to eat.
If you’ve ever tried to slice brownies, lemon bars, or layered treats and ended up with a gooey mess, you’re not alone. The good news? A few simple tricks can change everything.
Let’s walk through the easy steps that will help you make dessert squares that slice like a dream every single time.
Start with the Right Pan and Lining
Your pan matters more than you think.
Choose a metal baking pan instead of glass when possible. Metal heats evenly and helps desserts bake more consistently. That means fewer underbaked centers and overdone edges.
Next, line your pan properly:
- Use parchment paper.
- Leave extra paper hanging over the sides.
- Press it firmly into the corners.
- Lightly grease the paper if needed.
Those extra flaps act like handles. Once the dessert cools, you can lift it out in one smooth motion. No digging. No breaking.
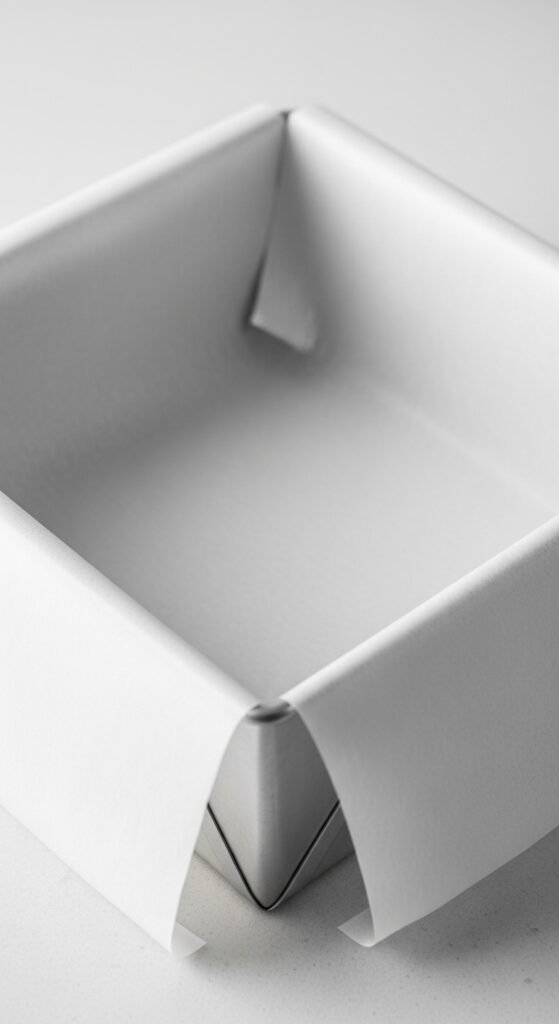
This simple step alone makes cutting so much easier.
Measure Carefully and Mix Gently
Clean cuts start before baking even begins.
Too much flour makes bars dry and crumbly. Too much liquid makes them sticky and hard to slice. Use proper measuring cups and level off dry ingredients with a knife.
When mixing:
- Stir until just combined.
- Avoid overmixing.
- Scrape the sides of the bowl.
Overmixing can create air pockets and uneven texture. That leads to cracked tops and crumbly edges. Gentle mixing keeps the texture smooth and firm.
If your recipe includes layers, press each layer evenly into the pan. Use the back of a spoon or the bottom of a measuring cup to flatten it.
Even layers bake evenly. Even baking means clean slicing.
Bake Until Just Set
One of the biggest mistakes? Overbaking.
Dry dessert squares crumble. Underbaked ones stick and smear.
To check for doneness:
- Look for slightly golden edges.
- Gently shake the pan. The center should barely jiggle.
- Insert a toothpick near the center. It should come out with a few moist crumbs, not wet batter.
If your recipe includes a custard or cheesecake-style layer, it should be set but still soft.
Remember, dessert squares continue to cook a bit after you remove them from the oven. So don’t wait until they look fully firm.
Let Them Cool Completely (This Is Key!)
Patience is everything here.
Warm dessert squares will fall apart when cut. Even slightly warm bars can leave messy edges.
Here’s the best method:
- Let the pan cool at room temperature.
- Once cool, lift the bars out using the parchment.
- Chill them in the fridge for at least 1–2 hours.
Chilling firms up butter, chocolate, and fillings. That makes slicing smooth and easy.
If you’re in a hurry, even 30 minutes in the freezer can help. But don’t skip this step. It’s the secret to sharp edges.
Use the Right Knife (And Clean It Often)
Your knife makes a big difference.
Use a long, sharp knife with a smooth blade. Avoid serrated knives unless the top layer is crunchy.
Here’s the pro trick:
- Run the knife under hot water.
- Wipe it dry with a clean towel.
- Make one firm, steady cut.
- Wipe the blade clean.
- Repeat before every slice.
Yes, wipe the knife after every cut. It may seem like extra work, but it keeps chocolate, crumbs, and filling from dragging across the surface.

For extra-perfect edges, use a ruler to measure evenly spaced cuts before slicing.
Mark Before You Cut
Want perfectly even squares?
Lightly score the top first. Use the tip of your knife to mark lines without cutting all the way through.
You can:
- Divide the pan into halves.
- Then divide each half again.
- Continue until you get even squares.
This helps you stay straight and avoid uneven pieces.
If you’re serving guests or sharing online photos, those even squares look so professional.
Wipe the Edges for a Polished Finish
If you’re feeling fancy, here’s one last tip.
After cutting, gently trim the outer edges. The very outer layer sometimes bakes slightly darker or uneven. Trimming creates perfectly sharp sides.
You can snack on the trimmings (chef’s reward!).
For extra shine on chocolate-topped bars, lightly warm the blade before the final slice. The heat melts through chocolate smoothly without cracking.
Now your dessert squares are ready to impress.
Bonus Tips for Different Types of Dessert Squares
Here’s how to adjust based on what you’re making:
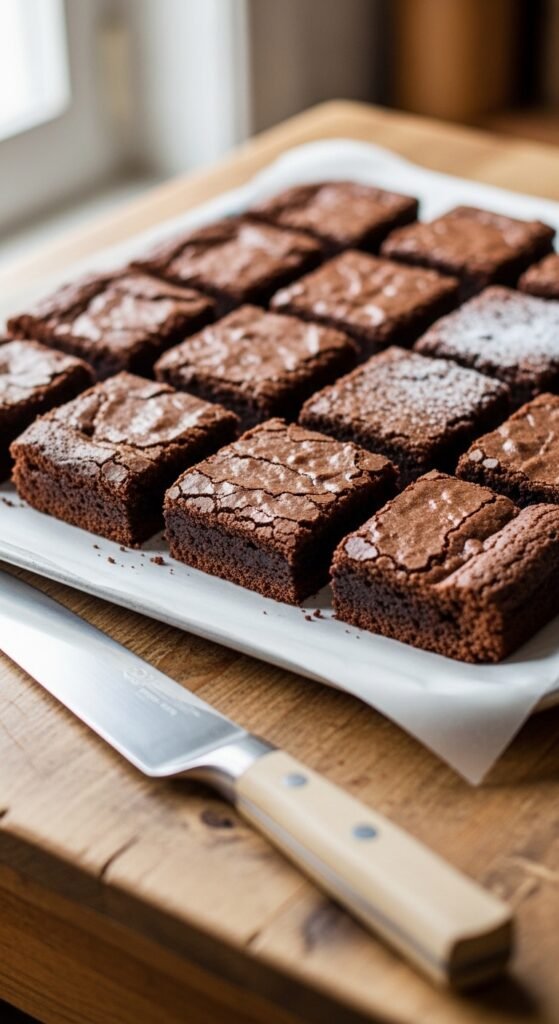
Brownies:
- Chill before cutting.
- Slightly underbake for fudgy texture.
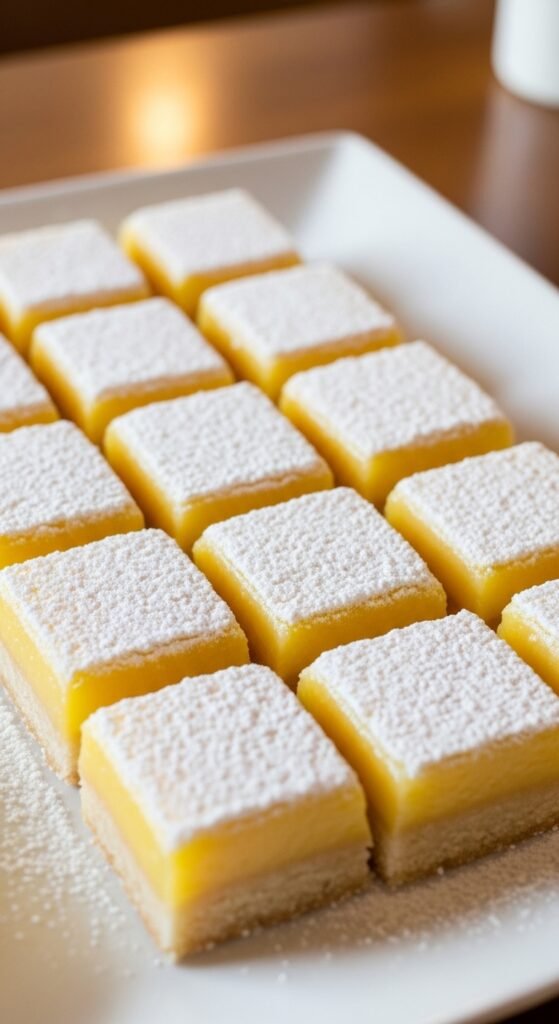
Lemon bars:
- Dust powdered sugar after cutting.
- Chill well to firm the filling.
Cheesecake bars:
- Use a water bath for smooth texture.
- Refrigerate overnight for best slicing.
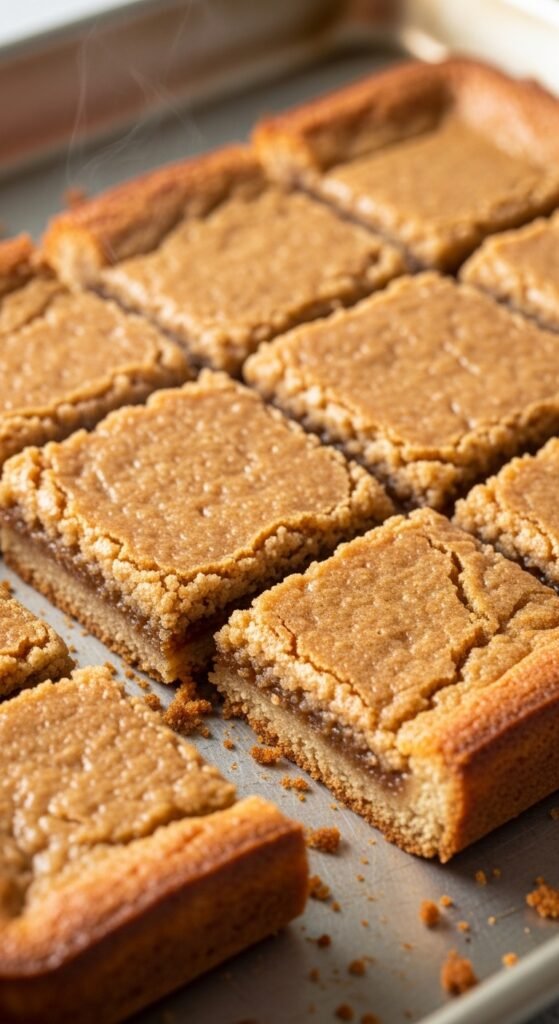
Layered cookie bars:
- Press base layer firmly.
- Let caramel layers cool fully before slicing.
Each dessert behaves differently. But cooling and clean knives always win.
Final Thoughts
Making dessert squares that cut clean isn’t about luck. It’s about simple steps done right.
- Line your pan.
- Bake carefully.
- Cool completely.
- Use a hot, clean knife.
- Wipe between slices.
That’s it.
With these easy tips, your brownies, bars, and layered treats will look bakery-perfect every time. No more messy edges. No more crumbles.
Try these tricks with your next batch and see the difference. And don’t forget—save this guide for later so you’ll never struggle with messy dessert squares again!

Leave a Reply