
Dessert trifles are the epitome of indulgence: layers of delicious cake, creamy fillings, fresh fruit, and a sprinkle of sweetness, all packed into a glass that lets you admire the beauty of every ingredient. But the key to making the perfect trifle lies not just in flavor, but in creating clean, distinct layers that make the dessert not only mouthwatering but visually appealing. If you’re ready to create a dessert that looks as good as it tastes, then follow this simple guide for making trifles with clean layers!
Step 1: Choose the Right Glassware
The first step to creating a stunning trifle is selecting the right glassware. A clear, wide glass bowl or individual glasses will allow you to showcase those beautiful layers. If you don’t have a trifle bowl, any clear container with enough space for multiple layers will work. Make sure it has a wide opening to showcase the layers clearly.
Tips:
- Opt for a shallow bowl or glassware that allows you to build high layers.
- The wider the container, the better you can display your layers.
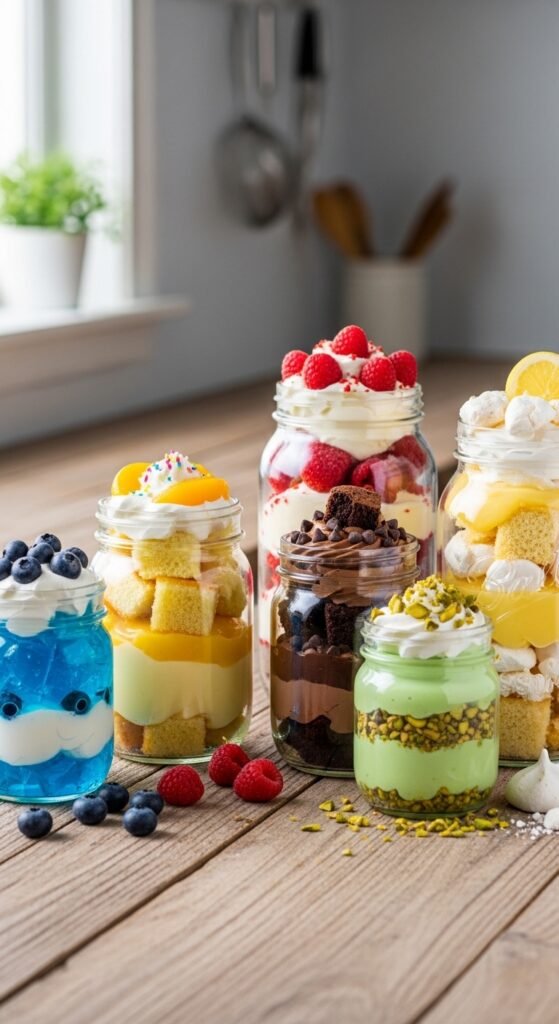
- You can even use mason jars for individual portions!
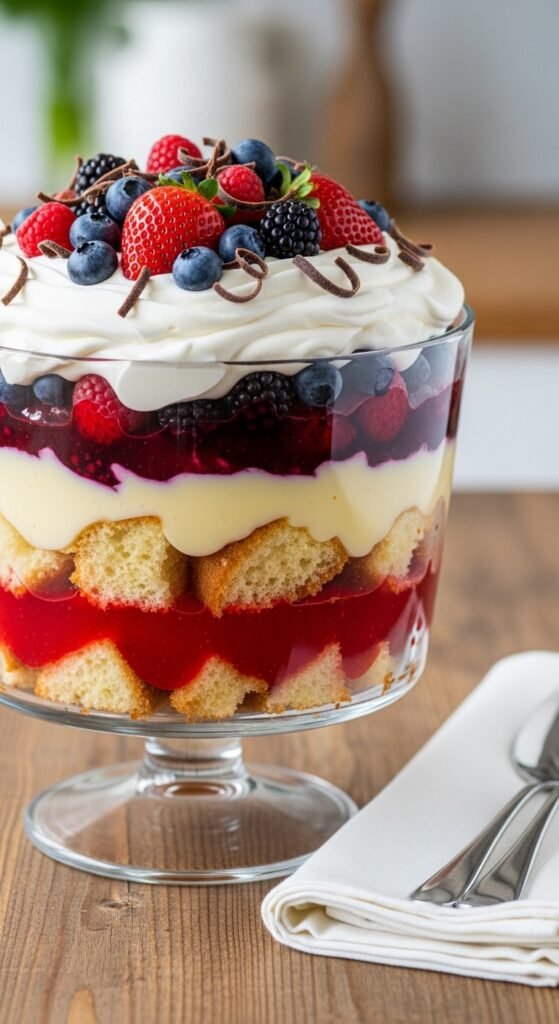
Step 2: Pick Your Base Layers
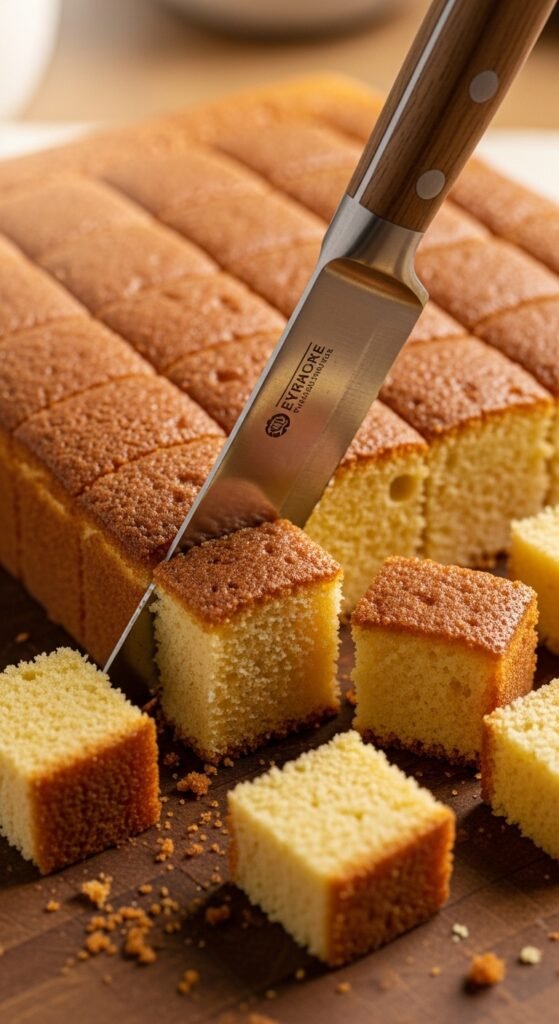
The base layer is usually cake, but feel free to get creative! A classic choice is sponge cake, pound cake, or ladyfingers. For a lighter option, you can even use angel food cake. Make sure the base is cut into small pieces to fit neatly into the bottom of your glassware.
Tips:
- For a more decadent treat, drizzle the cake with a bit of syrup or liqueur.
- Ensure the cake pieces are tightly packed at the bottom for a clean start.
- You can also use cookies or crumbled brownies if you’re looking for something different.
Step 3: Add Creamy Layers
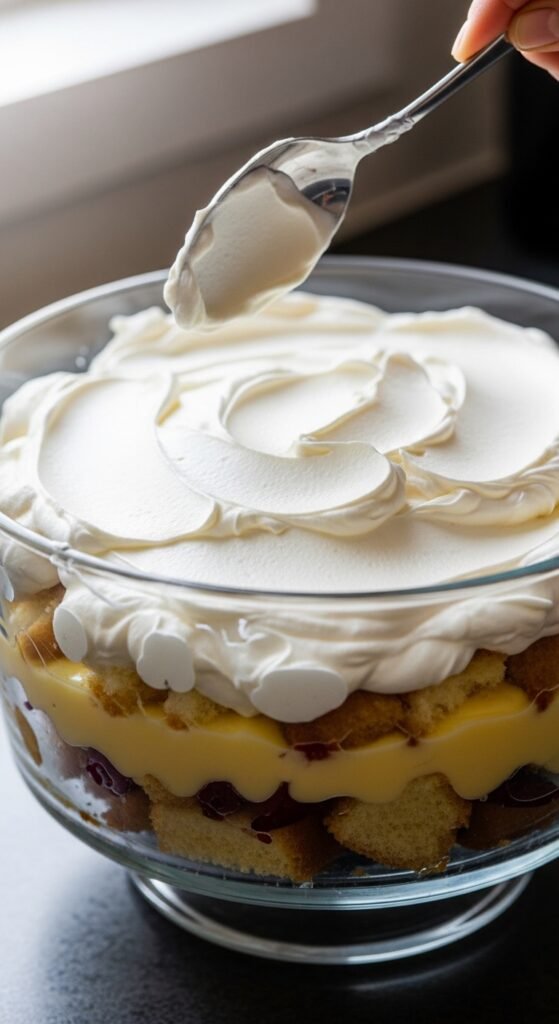
Now comes the creamy goodness! Whipped cream, custard, or mascarpone cheese are all great choices for the middle layer. A simple custard can add richness, while whipped cream gives a light and airy feel. You can even mix the two for a layered, creamy effect. Spread your creamy mixture evenly over the cake layer, smoothing it out to ensure clean lines.
Tips:
- To keep the layers clean, avoid overfilling with cream—just a generous scoop will do.
- If you’re using store-bought whipped cream, ensure it’s not too runny.
- For extra flavor, infuse your whipped cream or custard with vanilla extract or lemon zest.
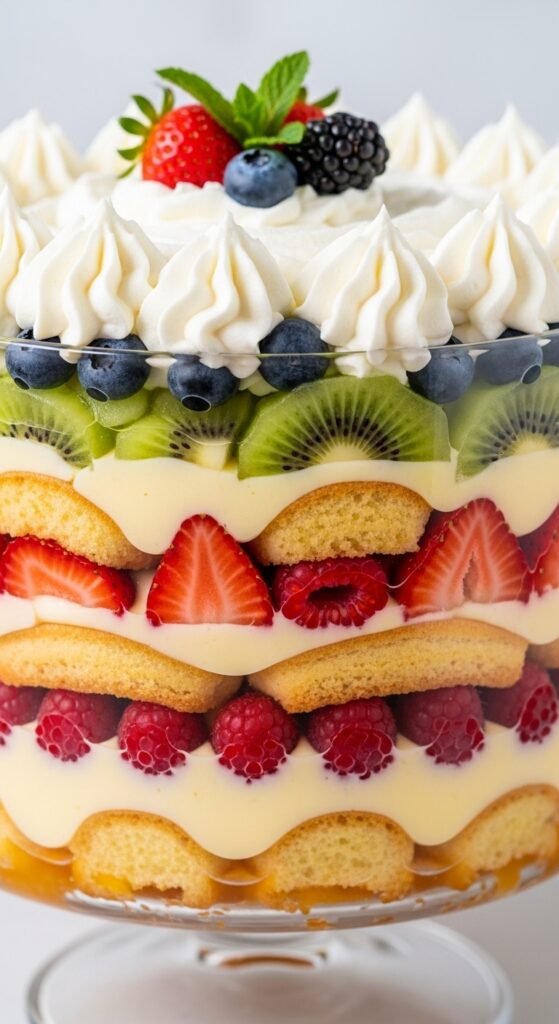
Step 4: Layer in Fresh Fruit
To add a burst of color and freshness, incorporate fruits like strawberries, raspberries, blueberries, or even tropical fruits like mango. Arrange them in neat rows or clusters to keep the layers distinct. The natural sweetness of the fruit will balance out the richness of the cake and cream layers.
Tips:
- Layer the fruit in between the cream and cake for an aesthetically pleasing look.
- Opt for fruits that don’t release too much juice, as they might mix with the cream.
- Keep the fruits colorful for an eye-catching trifle!
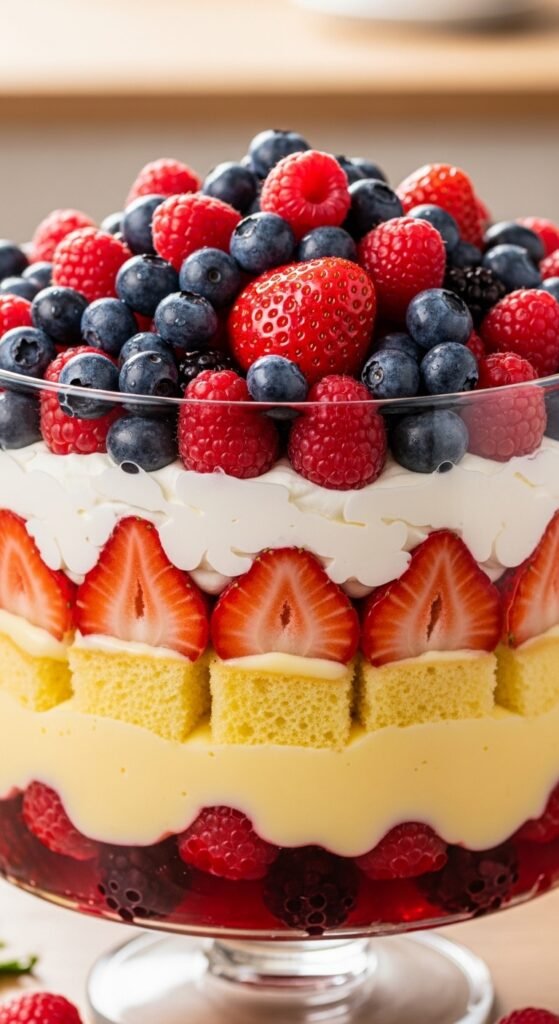
Step 5: Build Multiple Layers
For a truly show-stopping trifle, you’ll need at least two to three layers. After placing your cream and fruit, repeat the process of adding cake, cream, and fruit. Make sure each layer is evenly spread to maintain clean, defined lines.
Tips:
- Press down gently on each layer to keep everything compact, but avoid squashing it.
- If you’re using different fruits, alternate the colors to create a visually striking effect.
- Keep the proportions balanced—don’t make the layers too thick, or they might lose their structure.
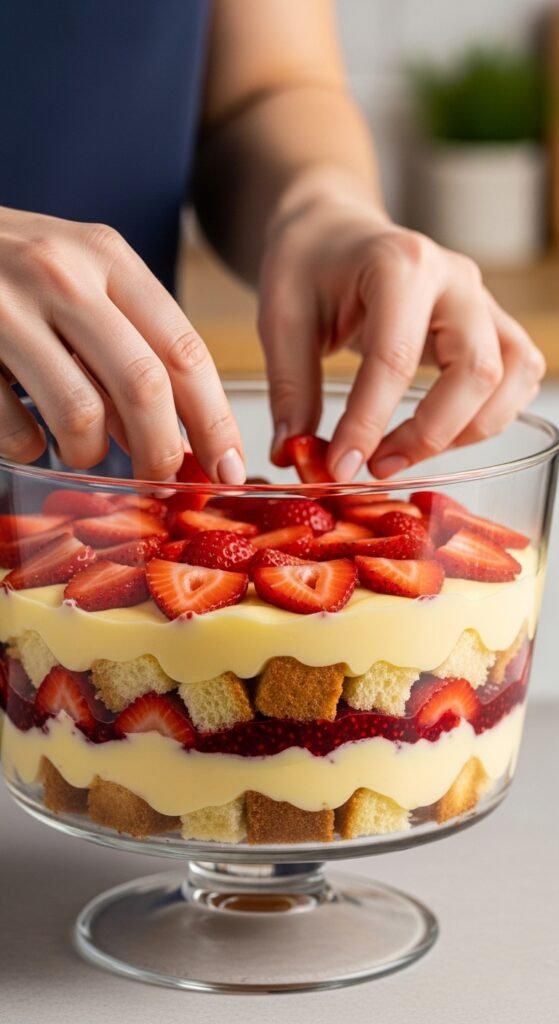
Step 6: Garnish and Serve
Once you’ve built your perfect layers, top your trifle with a final layer of cream or custard. Garnish with a sprinkle of grated chocolate, crushed nuts, or more fresh fruit for added texture and flavor. Refrigerate the trifle for a couple of hours before serving to allow the layers to set.
Tips:
- A few chocolate shavings or mint leaves can elevate the look of your trifle.
- For an added crunch, sprinkle some crushed cookies or granola over the top.
- Serve chilled to let the flavors meld together beautifully.
Conclusion: The Art of Layering
There you have it! With a little patience and attention to detail, you can create a stunning dessert trifle with perfectly clean layers. Whether you’re making it for a special occasion or simply treating yourself, this dessert will surely impress.
Don’t forget to save this recipe for later and try your own creative spins—whether it’s adding different fruits, experimenting with cake bases, or mixing up the creamy layers. Your perfect dessert trifle awaits!

Leave a Reply