
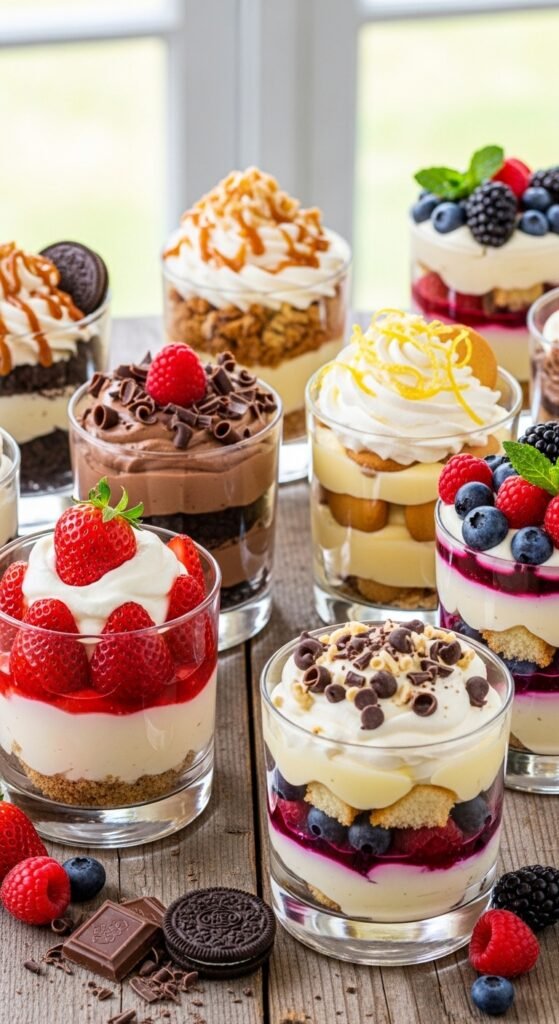
Craving a sweet treat but don’t want to spend hours in the kitchen? No-bake dessert cups are your perfect solution! They’re quick, delicious, and customizable with endless flavor combinations. Whether you’re hosting a party, making a last-minute dessert, or just satisfying your sweet tooth, these no-bake cups are sure to impress. Let’s dive into how you can whip up these simple yet scrumptious treats!
Why No-Bake Dessert Cups Are the Best Choice
No-bake desserts are incredibly easy to make because they require minimal effort, no oven, and very few ingredients. The best part? You don’t need any fancy equipment or baking skills. With just a few basic ingredients, you can create a fun and visually appealing dessert in minutes. Plus, these cups are portable, making them great for picnics, potlucks, or even a sweet treat for the kids after school.
What You’ll Need
Before you start, gather the following ingredients and tools:
- Ingredients:
- 1 package of graham crackers (or any cookie of your choice)
- 2 cups of whipped cream or whipped topping
- 8 ounces of cream cheese (softened)
- 1/2 cup of powdered sugar
- 1 teaspoon of vanilla extract
- 1/2 cup of fruit (like strawberries, blueberries, or raspberries) or chocolate chips
- 2 tablespoons of melted butter
- Tools:
- A bowl for mixing
- A spoon or spatula
- Small dessert cups or jars
- A food processor or a plastic bag and rolling pin (for crushing graham crackers)
Step-by-Step Instructions
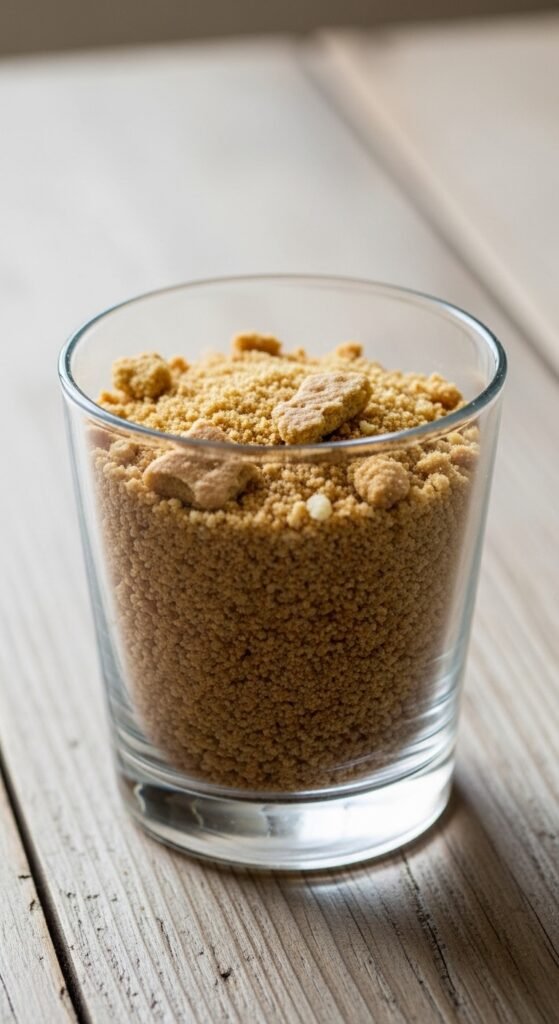
1. Prepare the Crust
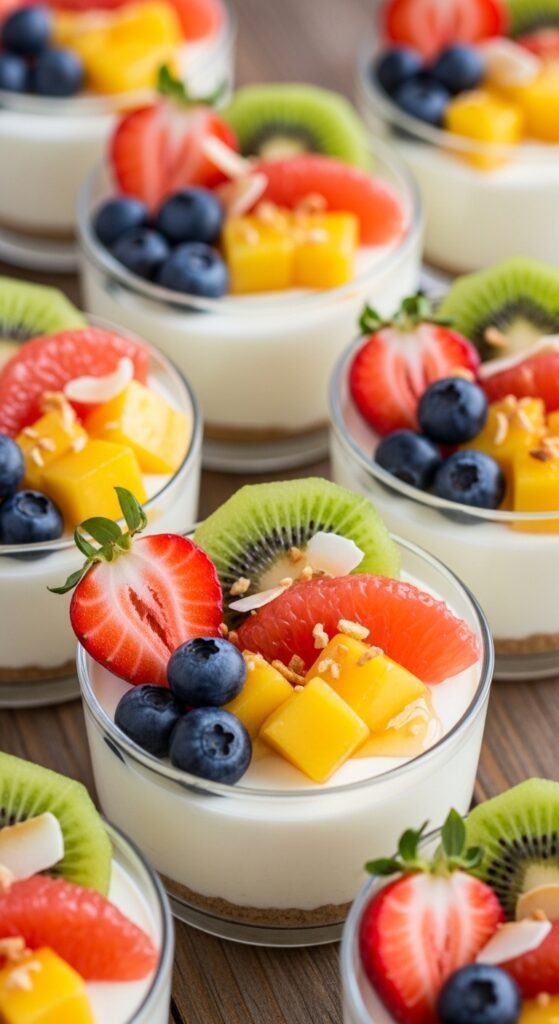
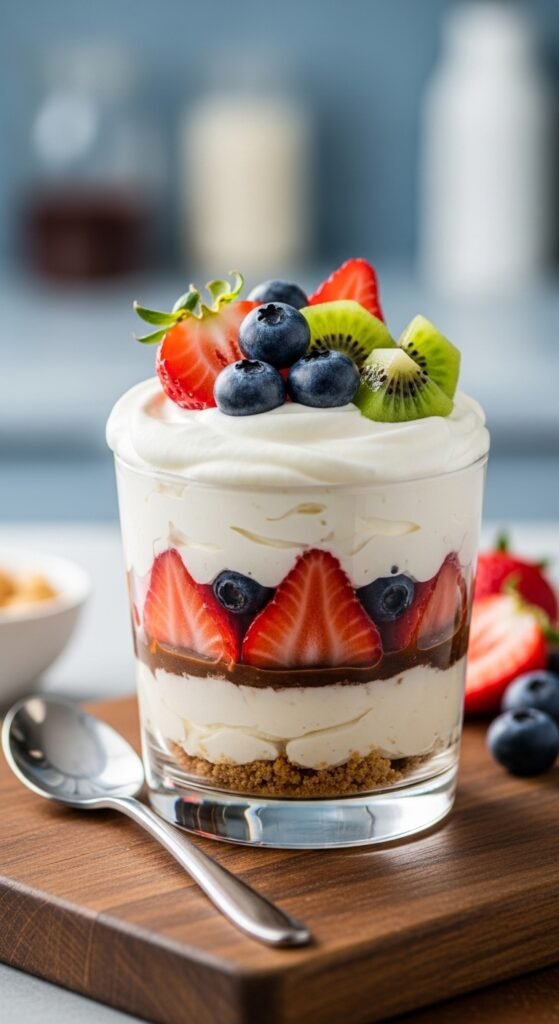
Start by making the crust for your no-bake dessert cups. Crush your graham crackers or cookies into fine crumbs using a food processor or by placing them in a plastic bag and smashing them with a rolling pin. Mix the crumbs with melted butter to create a crumbly base that will hold everything together.
Divide the crumb mixture evenly into your dessert cups, pressing it down gently to form a crust at the bottom. This will give your dessert that classic “pie” texture without the need to bake.
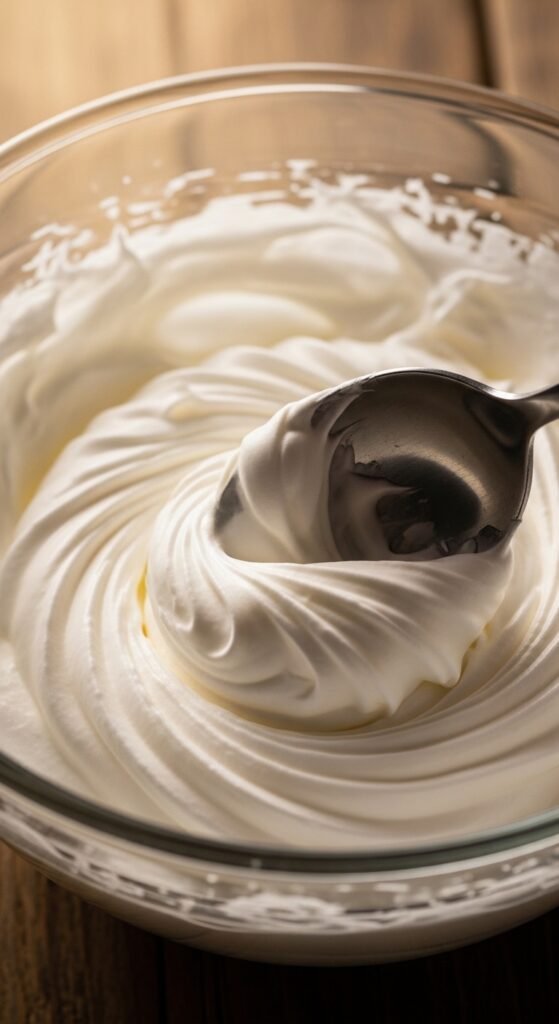
2. Prepare the Creamy Layer
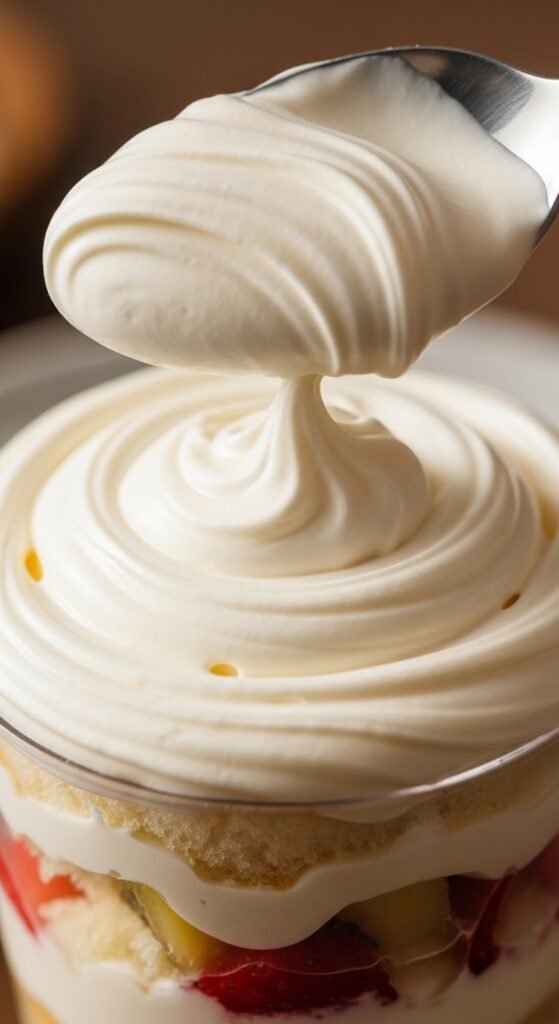
In a separate bowl, combine the softened cream cheese, powdered sugar, and vanilla extract. Mix them together until smooth. Then, gently fold in the whipped cream or whipped topping. This will create a light and airy filling that complements the crunchy base.
Once everything is well combined, spoon the creamy mixture on top of the graham cracker crust in each cup. Use a spoon or spatula to smooth the top of each one.
3. Add Toppings
Here’s where you can get creative! The best part about no-bake dessert cups is that you can customize them with your favorite toppings. Some popular choices include fresh fruits like strawberries, raspberries, or blueberries. You can also sprinkle some chocolate chips, crushed nuts, or a drizzle of caramel or chocolate sauce.
This step allows you to personalize each cup, so everyone gets a dessert they’ll love!
4. Chill and Serve
Once your cups are assembled, pop them into the fridge for at least 30 minutes to chill. This step helps the flavors meld together and gives the dessert cups a firmer texture.
When ready to serve, remove them from the fridge and enjoy! These no-bake dessert cups are best served cold, so they’re perfect for hot summer days or any occasion when you need a quick dessert that doesn’t require baking.
Tips for Perfect No-Bake Dessert Cups
- Make it dairy-free: Swap the cream cheese and whipped topping for non-dairy alternatives like coconut cream or dairy-free whipped cream.
- Use different cookies for the crust: Try using Oreos, vanilla wafers, or graham crackers for a unique flavor base.
- Prepare in advance: No-bake dessert cups can be made a day in advance. Just store them in the fridge, covered with plastic wrap, and they’ll be ready to serve when you need them.
Conclusion
No-bake dessert cups are not only easy to make, but they’re also versatile and fun to eat. Whether you’re making them for a party, a picnic, or a cozy night at home, these cups are sure to be a hit. So, gather your ingredients, get creative with your toppings, and start making these delicious treats today!
Save this recipe for later – your friends and family will be asking for it every time!

Leave a Reply