
There’s something magical about a bowl of freshly whipped cream—soft, airy, and just sweet enough. But if you’ve ever watched it deflate minutes after piping, you know the frustration. The good news? Making homemade whipped cream that actually holds its shape is simple when you know a few key tricks.
This guide walks you through everything—from choosing the right ingredients to stabilizing methods that keep those beautiful peaks intact for hours. Perfect for topping cakes, piping cupcakes, or dolloping onto desserts.
Why Homemade Whipped Cream Loses Its Shape
Whipped cream is made by incorporating air into heavy cream. When done correctly, tiny air bubbles are trapped by fat molecules, creating volume and structure. But without the right conditions, that structure collapses quickly.
Common reasons whipped cream falls flat:
- Cream isn’t cold enough
- Fat content is too low
- It’s under-whipped or over-whipped
- No stabilizer is used for longer hold
Understanding these basics sets you up for success.
Ingredients You’ll Need (And Why They Matter)
Great whipped cream starts with simple, high-quality ingredients.
Essentials:
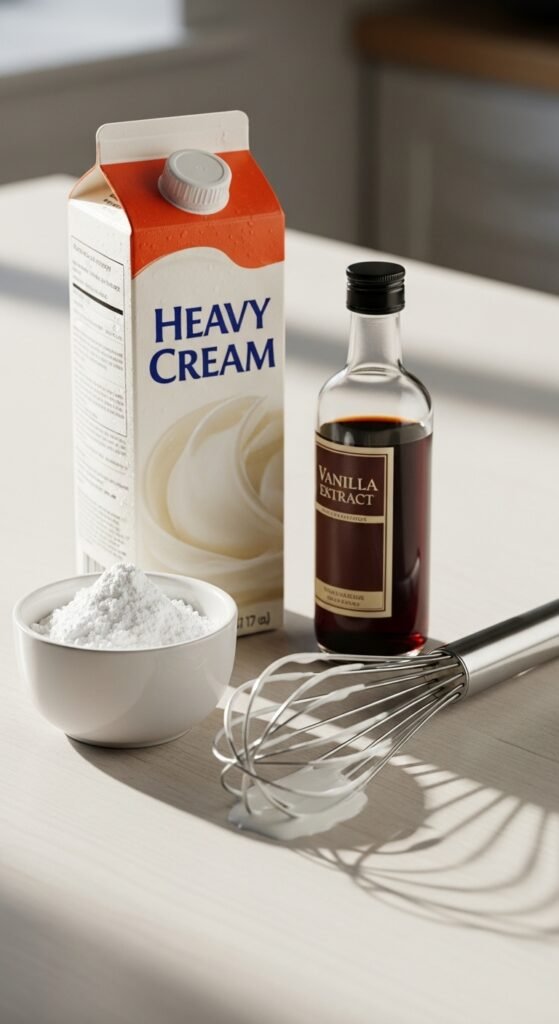
- Cold heavy cream (at least 35–36% fat)
- Powdered sugar (dissolves smoothly)
- Pure vanilla extract (optional, for flavor)
Powdered sugar is key here. It contains a small amount of cornstarch, which already helps stabilize the cream better than granulated sugar.
Step-by-Step: How to Whip Cream That Stays Firm
Follow these steps closely for consistent results.
1. Chill Everything
Place your mixing bowl and whisk (or beaters) in the freezer for 10–15 minutes. Cold tools help the cream whip faster and hold air better.
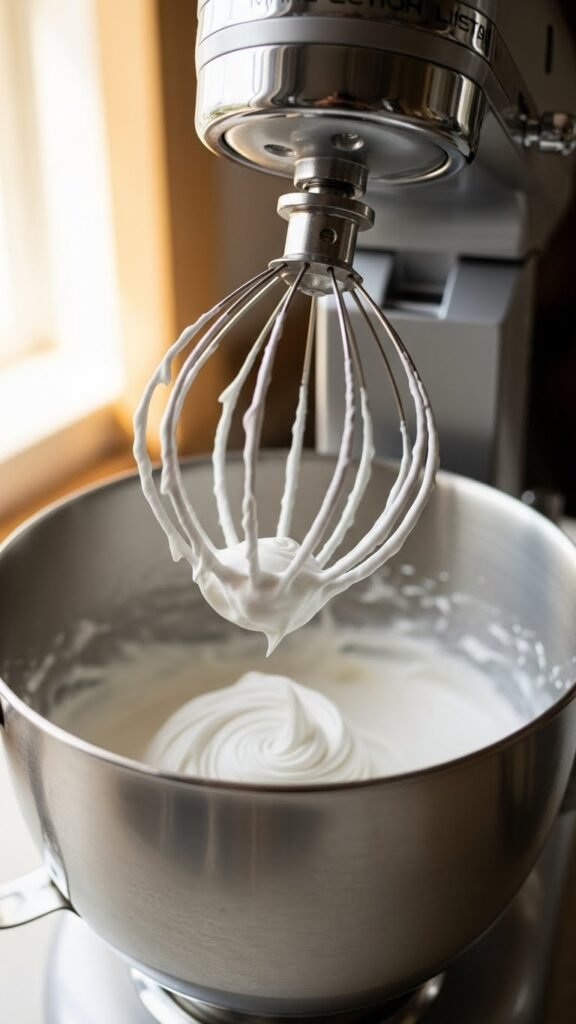
2. Start Slow, Then Increase Speed
- Pour cold heavy cream into the chilled bowl
- Begin mixing on low speed for about 30 seconds
- Gradually increase to medium-high
This creates stable bubbles instead of large, fragile ones.
3. Add Sugar at the Right Time
Once the cream thickens slightly (soft waves form), add:
- 2–3 tablespoons powdered sugar per cup of cream
- Vanilla, if using
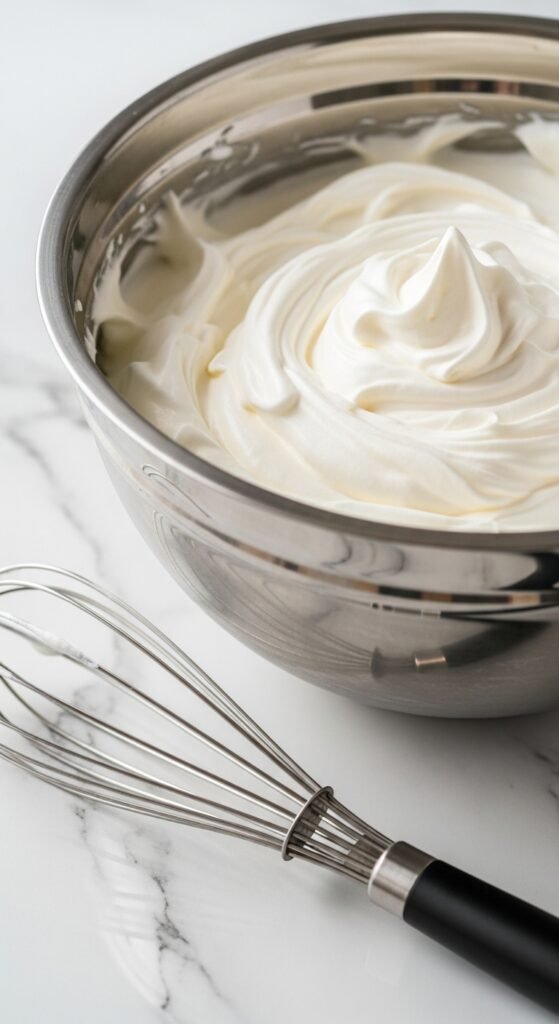
Continue whipping until stiff peaks form—peaks that stand straight without drooping.
Stop immediately once stiff peaks appear. Over-whipping turns cream grainy and eventually buttery.
How to Stabilize Whipped Cream (Best Methods)
If you need whipped cream to last longer—especially for piping or warm rooms—use a stabilizer. These methods don’t affect taste when done right.
Option 1: Cornstarch (Easy & Subtle)
- Mix 1 teaspoon cornstarch with powdered sugar before adding
- Works well for short-term stability (2–4 hours)
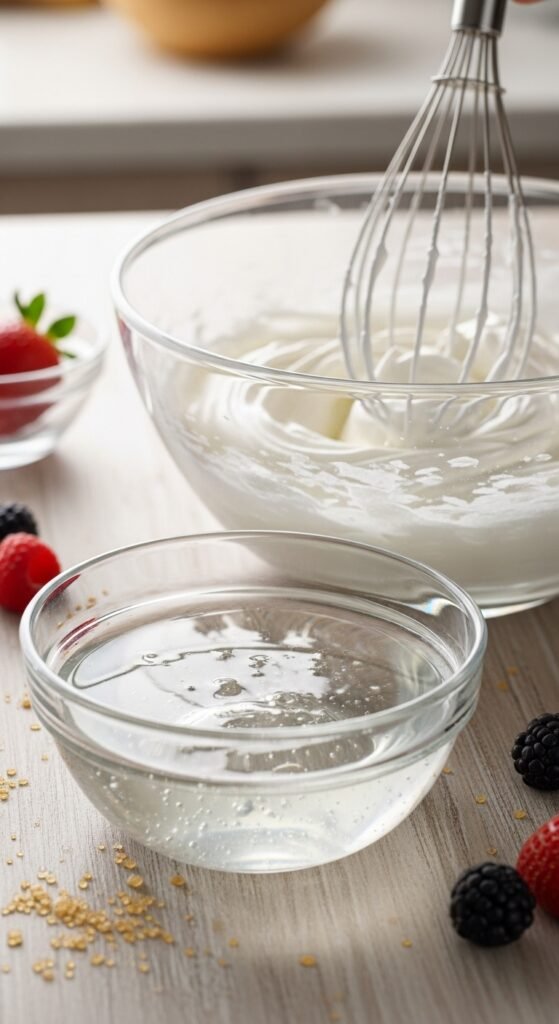
Option 2: Gelatin (Strongest Hold)
- Bloom ½ teaspoon unflavored gelatin in 1 tablespoon cold water
- Gently warm until dissolved (not hot)
- Cool slightly, then drizzle into cream while whipping
This method keeps whipped cream firm for hours, even overnight.
Option 3: Cream Cheese (Great for Frosting)
- Beat 2 tablespoons softened cream cheese with sugar first
- Add cream and whip as usual
Perfect for cakes and cupcakes where structure matters.
Tips for Perfect Peaks Every Time
Use these pro tips to avoid common mistakes:
- Always use full-fat heavy cream, not light cream
- Whip in a cool room if possible
- Watch the texture closely—seconds matter near the end
- If it looks slightly loose, give it just a few more seconds
If you accidentally over-whip:
- Add 1–2 tablespoons cold cream
- Gently fold by hand to smooth it out
How Long It Lasts and How to Store It
Homemade whipped cream is best fresh, but proper storage helps.
- Unstabilized: 2–3 hours at room temperature, 24 hours refrigerated
- Stabilized: Up to 48 hours refrigerated
Store in an airtight container. Re-whisk gently if needed before serving.

When to Use Stabilized Whipped Cream
Stabilized whipped cream is ideal for:
- Piped decorations
- Layer cakes
- Make-ahead desserts
- Warm or outdoor settings
For quick desserts eaten right away, classic whipped cream works beautifully.
Final Takeaway
Once you learn how to control temperature, timing, and stabilization, homemade whipped cream becomes reliable and stress-free. It’s lighter, fresher, and more customizable than store-bought versions—and it looks stunning on any dessert.
Save this recipe for later, and enjoy perfectly fluffy, long-lasting whipped cream whenever you need it.

Leave a Reply